Research Engineering OS

Compress rework into standards + templates + checklists
Author: Li Hongmin (李鸿敏) The University of Tokyo, Computational Biology and Medical Sciences
About This Book
This is not a book that teaches you “how to write code,” but a book that teaches you how to manage research code.
Target readers:
- AI/ML researchers
- Computational biology researchers
- AI for Science
Core ideas:
- Experiments are the unit (not code files)
- Exploration can be messy, but outputs must be cleanable
- Conclusions can be temporarily fragile, but the chain of evidence must be solid
Read Online
This book is fully open source and can be read online for free. If you find it helpful, you’re welcome to:
- ⭐ Star it on GitHub
- 📖 Buy a paperback/Kindle edition to keep
- 💬 Share feedback and suggestions
Version Information
- Online version: continuously updated, includes the latest content
- Print edition: v1.0, first published in February 2026
Start Reading
Start from the Preface, or jump directly to:
- Why It Always Blows Up at the End - understand the root cause
- Experiments Are the Unit - core concept
- Repository Structure - practical guide
Contact
- Email: lihongmin@edu.k.u-tokyo.ac.jp
- Website: li-hongmin.github.io
© 2026 Li Hongmin. All rights reserved.
Preface
The AI era has further blurred the boundary between research and development: from formulating hypotheses, building prototypes, and running experiments, to solidifying results into a reproducible chain of evidence—all of this is now completed within shorter cycles. Meanwhile, AI coding assistants have made it easier than ever to “write code that runs,” yet they have also made it harder to “write research code that is trustworthy, traceable, and reproducible.”
I wrote Research Engineering OS not to offer yet another abstract “methodology,” but to compress the pitfalls I have repeatedly encountered in academic machine learning / computational biology research into a set of executable default behaviors: use standards to reduce rework, use templates to lower collaboration costs, and use checklists to proactively absorb, within the daily rhythm, risks that would otherwise explode only at the final stage.
The central thesis of this short book is straightforward: exploration can be wild, but outputs must be cleanable; conclusions may be temporarily fragile, but the chain of evidence must be solid. You may iterate quickly, but you must leave enough information for every “apparently effective” result so that it can still be reproduced, questioned, and validated a week later, a month later, or on a different machine.
Accordingly, this book will repeatedly emphasize three things:
-
Experiments are the minimal unit: what you record is not “which code was changed,” but “which versions and configurations constitute this experiment.”
-
Default automatic traceability: make run_id, commit, config, data versions, and environment summaries part of the pipeline.
-
Front-load DoD and checklists: decompose the rigor demanded at the paper-writing stage into small actions executable in everyday work.
- If the work you are doing belongs to “research development” in the AI era—where you must maintain exploratory speed, remain accountable for results, and communicate efficiently with collaborators—I hope this book can serve as a minimal operating system beside your desk.
-
:: flushright Li Hongmin (李鸿敏)
Department of Computational Biology and Medical Sciences
Graduate School of Frontier Sciences, The University of Tokyo
5-1-5 Kashiwanoha, Kashiwa-shi, Chiba 277-8561, Japanli-hongmin.github.iolihongmin@edu.k.u-tokyo.ac.jp -
::
Why Do You Always Overturn Everything at the End (Exploration Debt / Validation Debt / Reproducibility Debt)

Story Setup: With Only a Few Days Left Before the Deadline, You Suddenly Stop Trusting Your Results
Imagine this scenario: only a few days remain before the paper deadline. After finally finishing all experiments, you are about to write the conclusions. But then doubt creeps in: perhaps a key experiment has not been validated under another data split? Perhaps a baseline was run unfairly? You decide to be cautious and rerun it.
Then the nightmare happens: after rerunning, the metrics differ from before. A method that was previously “significantly better” is suddenly no longer clearly ahead; or you find that changing the random seed makes the result drop. Cold sweat breaks out—months of work feel as if they were built on sand. With an imminent DDL (deadline) on one side and conclusions that no longer hold on the other, you are forced to overturn everything and start over.
Does this kind of “late-stage explosion” feel familiar?
Why This Happens: Three Types of Debt Explode in the Late Stage
Why is it that at the very last moment—“about to write the paper / about to defend / about to submit”—we suddenly discover that our results do not hold, and we have to overturn and redo everything?
This is not an isolated case. My observation is that it is usually not caused by a single-point bug, but by three types of debt that are tacitly accumulated early and then explode collectively later—exploration debt, validation debt, and reproducibility debt.
In other words, in order to save effort during the research process, we accumulate a great deal of “debt,” and only at the end are we forced to repay it all at once. The purpose of this book is to decompose this last-minute, fire-under-the-feet rework into small, manageable daily steps, so that the tragedy does not repeat.
Symptom Checklist: You May Be Heading Toward a Final Overturn
If the following symptoms feel familiar, you are likely accumulating research debt without realizing it, laying the groundwork for a final-stage “explosion”:
-
Your conclusions require “storytelling” to be self-consistent: You can explain why it works, but cannot clearly state under what conditions it fails; you rarely proactively discuss negative results and boundary conditions.
-
Results are extremely sensitive to environment/random seeds: Switching machines, changing a driver version, or using a different random seed causes the metrics to drift unpredictably.
-
No single “clean mainline” runs end-to-end: There are many branches, scripts, and outputs, but you cannot go from preprocessing to the paper’s main metrics with a single command.
-
Incomplete controls: Baselines are not strong enough, evaluation protocols are inconsistent, key ablations are missing, and failure cases are not explained.
-
Figures depend on manual operations: Tables and curves rely on copy-paste/manual run selection; once source data updates, everything must be redone by hand, so the closer you get to the deadline, the less you dare to touch anything.
-
You start to fear rerunning: You vaguely know that if you rerun, the results may not match your memory—or may not be recoverable at all.
The more boxes you tick, the more you are borrowing from the future: trading convenience now for high-pressure rework at the end.
A Common Plot: Why “Late-Stage Explosion” Is Almost Inevitable
Looking back at the trajectory of many projects, one finds that a “late-stage explosion” is almost inevitable. The plot often goes like this:
-
Early sprint: To see a signal as quickly as possible, you cobble together code in the fastest—but not necessarily disciplined—way: if you can edit a script directly, you do not create a new module; parameters are hard-coded; experimental outputs are scattered everywhere… In short, you just make it run first.
-
Signal appears: You see a curve that “looks good,” so you keep stacking tricks, adjusting data splits, and modifying training details to push the metric a bit higher; meanwhile, you postpone control experiments and organization work.
-
Paper pressure hits: You suddenly need reproducible main results, complete baselines, and interpretable ablation analyses; you start filling in these validations.
-
System collapse: As soon as you try to fill them in, things break: results are unstable, baselines catch up, hidden bugs or data leakage are exposed; you realize you cannot answer questions like “Is it accidental? Is there leakage? Does it only work for a particular seed?”
The key issue is not that “exploration should not be fast”—exploration can certainly be fast. But speed presupposes that what follows is cleanable and traceable. Otherwise, the faster you run, the more leverage you apply to accumulate debt, and the higher the risk of crashing at the end.
Explanatory Model: Three Types of Debt
To explain the above issues more systematically, we introduce the concept of “debt.” Similar to technical debt in software engineering, research work can also incur different forms of debt—exploration debt, validation debt, and reproducibility debt.
Exploration Debt
Definition: To iterate faster, we temporarily take nonstandard shortcuts in code and experimental workflows; the accumulated burden of these expedients is exploration debt. Exploration debt is not inherently evil, provided that it is cleanable, discardable, and recoverable.
Typical signals:
-
A proliferation of “temporary scripts”:
test.py,try1.ipynb,debug_old.py… no one dares to delete them. -
Chaotic output directories:
outputs/is filled with folders likefinal_final2/,exp_new_try/, with unclear relationships. -
The same logic is copy-pasted and modified in multiple places; the codebase feels stitched together, and any change triggers cascading effects.
Real cost: When you need to converge onto a mainline, you cannot extract a clean path: you cannot tell what the final method needs versus what is a dead end; you have also likely forgotten how certain results were obtained.
Validation Debt
Definition: To prove that something “works” as quickly as possible, we skip the control experiments and rigorous tests that should have been done; these skipped validations must be paid back sooner or later, and the closer you are to publication, the higher the cost.
Typical signals:
-
Baselines are not strong enough, or they do not share the same evaluation protocol as the method (not directly comparable).
-
Missing ablations: you do not know which change contributes the main gain.
-
Inconsistent metric definitions: thresholds/post-processing/data filtering differ across runs.
Real cost: Your claims cannot withstand scrutiny: reviewers often ask not for a “larger model,” but for “more rigorous controls and analysis.”
Reproducibility Debt
Definition: To obtain results quickly, we fail to promptly freeze the environment, data versions, hyperparameter configurations, and sources of randomness; as a result, the same code may not reproduce the same conclusion.
Typical signals:
-
You remember a run that performed very well, but cannot find the corresponding commit/config/seed/data version.
-
Dependency drift: it ran yesterday, but today installing some package breaks it or causes a major performance drop.
-
Training scripts are full of implicit defaults and hard-coded values: others (including your future self) cannot identify the key hyperparameters.
Real cost: Reproducibility debt takes away your initiative at the most critical moment: you cannot confidently answer “Are the results stable/reproducible?”, nor can you calmly handle paper checks and reproduction experiments.
Chapter Conclusion: Default Behaviors, Not Complex Tools
When people encounter these problems, they often place their hopes on more complex toolchains. This chapter emphasizes instead: what you need is not more complex tools, but a set of good default behaviors.
In the AI era, the barrier to code generation is decreasing, but the cost of validation and reproducibility has not decreased accordingly; it may even increase in relative terms because iteration is faster.
Rather than relying on heavy post hoc remediation, it is better to cultivate lightweight default habits in daily research and keep debt at a minimum:
-
Any “promising” result must be rerunnable (at least once): first confirm it is not an accidental fluctuation.
-
Any change that affects conclusions must be explainable as a controlled experimental difference: change one thing, test one thing; control variables.
-
Any exploration path must be discardable: archive what is valuable, clean what is not, and keep the mainline clean.
Principles of This Book (Ideas That Run Through Subsequent Chapters)
-
Small, verifiable steps: each iteration introduces only one interpretable variable change; prioritize ensuring the system can run and be tested.
-
Mandatory traceability: commit, config, seed, data version, and environment summary are all treated as part of the experimental artifact.
-
Stability/Exploration Isolation: The stable mainline is used to ensure paper reproducibility; the exploration branch is used for rapid trial-and-error, with linkage established via checklist-based acceptance.
10-Minute Actions You Can Do Right Now
If you do only one thing right now: create a reproducible minimal entry point for the current best result.
-
Centralize Outputs: Assign a
run_idto the best experiment and consolidate key outputs into the corresponding directory. -
Archive the Configuration: Create a minimal config file and write down the key hyperparameters.
-
Record the Fingerprint: Note the commit, seed, data version, and major dependency versions (even if handwritten for now).
-
Re-run Independently: Re-run once in a new terminal/new process using that config, and confirm the result returns to the same order of magnitude.
If it goes smoothly, you obtain a reusable template; if not, you surface problems early—there is still time to fix them now.
Subsequent chapters will expand these 10-minute actions into a sustainable Research Engineering OS.
The Smallest Unit of a Project Is Not “Code,” but an “Experiment”
In research projects, if you treat the smallest unit as “code,” you will naturally tend to use Git to organize everything: commits, branches, merges, rollbacks, and so on. This habit is highly effective in engineering development, but it often fails in research work. The reason is that the ultimate output of research is not a piece of code itself, but a verifiable conclusion or discovery. In other words, code is merely one means to reach a research conclusion; experimental results are the outcomes we truly care about.
Conclusions come from experiments. An experiment is driven by a set of traceable input conditions and produces reviewable output results. Therefore, this book defines “experiment” as the minimal unit of project operations, and organizes directory structure, logging, automation workflows, and acceptance criteria around it. By treating experiments as the fundamental unit, we can ensure that every result is well-grounded, improving the reproducibility and reliability of research.
Definition of an Experiment: Turning “I Changed Something” into a Comparable Object
Simply put, an experiment = code version + configuration + data version + environment + outputs + metrics. More plainly: any result you obtain must be able to answer “Where exactly did it come from?” In other words, whenever you “change something” in code or configuration and produce a result, that run should form an independent, comparable experimental object.
Six Questions That Must Be Answerable
To ensure traceability and comparability of experimental results, each experiment must be able to answer at least the following six key questions:
-
What code was used? - Specify the code version, such as the Git commit hash, and whether the repository had uncommitted changes at the time (dirty). This ensures we know exactly which version of the code was used to run the experiment.
-
What configuration was used? - Specify the set of configuration parameters used, such as the configuration file path and the final parameter values after parsing and expansion. Configuration determines hyperparameters and runtime options and must be recorded explicitly.
-
What data was used? - Specify the dataset version or hash, as well as how the data was split (train/validation/test split). Different data directly affects results, so the data source and version must be described precisely. Ideally, data consistency can be proven via a data hash or a manifest file.
-
What environment was used? - Describe the environment information required for execution, such as the Python version, dependency versions, driver versions, and key hardware configuration (CPU/GPU model, etc.). Environmental differences may affect reproducibility; if someone reruns the experiment elsewhere, they need to know the original environment.
-
Where are the outputs stored? - Clearly record the locations of all files produced by the experiment, such as model weights, logs, prediction results, cached intermediate features, and so on. Outputs are the basis for subsequent analysis and verification; they must be preserved and retrievable.
-
What are the metrics, and how are they computed? - Provide the metrics used for evaluation and their computation methods, including evaluation scripts and any post-processing details. Different metric conventions make results incomparable; metric definitions must be transparent and consistent.
None of these six elements can be omitted. If any one question cannot be answered, the experiment is not fully reproducible, and any conclusion drawn will lack persuasiveness. Only when all six are satisfied can we say “we know where this result came from,” and only then can we precisely reproduce it later or compare it against other experiments.
Case: AI Generates “Seemingly Complete” Code That Cannot Run
In cross-language migration (“code translation”) scenarios, API hallucination frequently occurs: the model generates functions that look reasonable but do not actually exist in the target language’s libraries, causing the generated code to be non-executable. Researchers ultimately have to rewrite and fix files one by one (see case [case:code_translation_hallucination]{reference-type=“ref” reference=“case:code_translation_hallucination”**}). If we mistakenly treat “code” as the smallest unit of a project, we may fall into the trap of focusing only on how many files or lines of code were generated. The significance of using “experiment” as the smallest unit is that our acceptance criterion is not how many files were produced, but whether we produced runnable deliverables and metrics that can be evaluated comparatively. In other words, whether an experiment succeeds does not depend on how many lines of code were changed, but on whether you obtained an executable model or result, along with clear evaluation metrics to demonstrate the effect of the change.
The Experimental Object Model: Decomposing the Research Process into Stable “Five Elements”
To make each stage of the research workflow clear, controllable, easy to compose, and convenient for tool automation, we can describe the elements of the experimental process using a fixed set of conceptual objects. Each experiment involves the following five objects:
-
config (configuration): All key parameter settings for a single run. It should be serializable (for saving and recording), support partial overrides (for modifying defaults), and be easy to diff. A config defines how the experiment should run-e.g., model architecture parameters, learning rate, number of training epochs-and serves as the blueprint of the experiment.
-
dataset: The data version used and the splitting strategy. The dataset object should clearly identify the data used, for example via a version number, data hash, or manifest file to prove data consistency. This ensures that different experiments share the same data basis, or that data differences are explicitly understood.
-
run: A concrete code execution process. A run typically records a unique run_id, timestamp, the commit version of the code used, the corresponding config, random seed (seed), and runtime logs. A run represents an experiment that actually occurred-the process record of putting configuration and code into practice to obtain results.
-
artifact: All output files generated by a run. For example, trained model weight files, model predictions on the test set, cached intermediate features, and intermediate data produced during evaluation are all artifacts. Artifacts are the direct outputs of an experiment; subsequent analysis, comparison, and reporting are built on them. Preserving artifacts allows us to inspect or reuse results at any time without repeating expensive computation.
-
report: A human-readable summary, including plots, tables, key conclusion statements derived from experiments, and analyses of failure cases. A report can be viewed as transforming quantitative experimental results into qualitative insights; it often aggregates metrics and artifacts from multiple runs and provides references for readers or decision-makers. It is the final form in which experimental outcomes are presented.
The relationships among these objects can be summarized in one sentence:
config + dataset + env (environment), executed by code, produces a run; that run yields several artifacts; based on artifacts and computed metrics, we write a report.
With this object model, we decompose a complex research process into several stable “noun” objects, making it easier to think and communicate. For example, when discussing an experiment, we can clearly distinguish “which config and dataset were used,” “which artifacts were produced,” and “how the final report is written.” More importantly, this partitioning lays the foundation for subsequent tooling: we can define conventions for each object type (e.g., managing config with YAML files, storing artifacts in specific directories), thereby standardizing and automating the experimental workflow.
run_id: Making Every Run Unambiguously Referable
When writing a paper or report, you may need to frequently cite results produced under a specific configuration, e.g., “our best result under a certain setting is …”. If that experiment does not have a stable and unambiguous name, your description will be vague, which hinders reader understanding and can easily lead to confusion across experiments. To avoid this, we recommend generating a unique run_id for every run, and making this ID as readable and time-ordered as possible.
A practical approach is to combine a timestamp with a short description to form an ordered and interpretable name. For example, you can name runs by date and start time, then add a brief summary of the experiment:
2026-02-01_0930_baseline          (baseline experiment started at 09:30 on Feb 01, 2026)
2026-02-01_1130_ablation_noaug    (ablation experiment started at 11:30 on Feb 01, 2026 - removing data augmentation)
2026-02-02_0045_sweep_lr3e-4      (hyperparameter grid experiment started at 00:45 on Feb 02, 2026 - learning rate 3e-4)
With this naming convention, lexicographic ordering of files corresponds to chronological ordering, making it easy to see the sequence and approximate content at a glance. Each run_id is both unique and readable, avoiding vague and non-comparable names such as “experiment1” and “experiment2”.
For file organization, you can use the run_id as the directory name and centrally store all outputs of that experiment. For example:
outputs/<run_id>/
    run.json        # Metadata about this run (e.g., code version, start time, parameter configuration)
    run.md          # Optional: a log recording the description, observations, and preliminary conclusions for this run
    metrics.json    # Metric results for this experiment
    artifacts/      # Subfolder containing models, predictions, and other files produced by this run
With this structure, we can conveniently manage and query experimental results. For instance, when you want to compare multiple experiments, you can directly open metrics.json under the corresponding run_id directory to inspect metrics, or load models from artifacts for analysis.
Avoiding “final” chaos:
Many people like to use the word “final” when naming experiments, but a common situation is that after completing “experiment_final” they discover a small improvement is needed, leading to “experiment_final_v2” or even “final_final”. In the end, even the author cannot tell which one is truly the final result, causing confusion and misunderstanding. This is a typical consequence of non-standard naming. With the run_id approach, you no longer rely on such vague labels to mark the final outcome; instead, you identify each attempt with clear time and content descriptors. As for which experiment is ultimately adopted, you can simply state in the report which run_id is used. In short, do not let words like “final” interfere with experiment management; with a unified run naming scheme, every experiment is well-grounded-run N is run N-and confusion disappears.
A practical principle: put “comparability” as the top priority
In research, what often determines the pace of progress is not the physical time spent training models, but the repetition and uncertainty caused by a lack of comparability across experiments. If experimental conditions are inconsistent, then even after you obtain numerical results, it is difficult to determine where differences come from, and you may even end up discarding and redoing work. Common negative examples include:
-
Inconsistent evaluation criteria: The baseline and your new method use different evaluation scripts, resulting in different measurement conventions and making direct comparison impossible. This forces you to spend extra time re-evaluating both under the same standard.
-
Inconsistent post-processing: Experiment A and Experiment B use different post-processing or filtering strategies, causing metrics to be on different scales. For example, one result applies additional threshold filtering while the other does not; without unified processing, it is hard to clearly argue which method is better.
-
Inconsistent data splits: Experiment B temporarily switched datasets or splitting schemes without recording it; comparing its results with Experiment A is then inherently unfair-B may have used an easier test set while claiming superior performance. In such cases, even “better” results are meaningless because the comparison is not made on the same baseline.
For these reasons, we should always keep in mind: any important conclusion must come from the same evaluation pipeline, ensuring comparability between experiments. That is, when comparing two experiments, aside from the intentionally changed variable (e.g., model architecture, hyperparameters), all other components-data, evaluation criteria, post-processing methods, random seeds, etc.-should be kept as consistent as possible or at least be traceable. Once an inconsistency is found, either correct it in a new experiment and rerun, or explicitly document the differences in the report and avoid direct comparison.
Prioritizing comparability may require additional effort to align conditions when designing experiments, but it actually accelerates overall research progress. You avoid repeated trials and debates caused by unfair comparisons, and the conclusions from a single experiment become genuinely defensible and withstand scrutiny.
Starting from this chapter, all subsequent chapters-including repository structure, Git workflow, DoD (Definition of Done), logging practices, and AI-assisted workflows-will revolve around two core goals: “experiment traceability” and “result comparability”. The principles established in this chapter will run through the entire methodology of research management.
Your Repository Structure Is Your Second Brain
The “messiness” of research code is often not due to lack of ability, but because research is inherently parallel exploration: at the same time, you must maintain multiple hypotheses, multiple implementations, multiple experimental entry points, multiple outputs, and multiple plots.
When these things are piled together without structure, your brain is forced to act as an index: Which script still runs? Which output is trustworthy? Which change affected the metrics?
The purpose of a repository structure is not to look nice, but to reduce cognitive load: so that you can judge—without relying on memory—“Can this code be deleted? Is this output reliable? Is this path reproducible?”
Real Case: The Cost of Rapidly Piling Up Code

When I first started using AI coding assistants, I learned this lesson the hard way. To quickly validate an idea, I had Copilot generate a large amount of “runnable” code—data loading, model definitions, training loops, evaluation scripts, and so on. Within a few hours, I had built what looked like a complete framework.
Early “success”:

The code did run, and the experiments produced results. Excited, I continued iterating, repeatedly asking the AI to add new features: data augmentation, different model variants, various evaluation metrics… Each change had an “immediate effect,” and the codebase expanded rapidly.
The beginning of the collapse:
 Two weeks later, when I needed to prepare ablation and comparison experiments for a paper, the problems surfaced:
-
I could not tell which script was the latest and which was obsolete;
-
The same data-loading logic had been copy-pasted into five different files, each with slight differences;
-
The baseline and the new method used different evaluation code, so the results were not comparable at all;
-
I wanted to reproduce a “very good result,” but could not find the configuration and data version used at the time.
Starting over:

In the end, I had to stop all new experiments and spend three full days rewriting almost all the code. This rewrite was not because the AI-generated code had bugs, but because of a lack of structure: reusable core logic and one-off experimental scripts were mixed together; quick-and-dirty trial code was not cleaned up in time; outputs were scattered everywhere and hard to trace.
This experience made me deeply understand: AI can help you produce code quickly, but the structure must be designed by humans. If, from the beginning, you separate “stable” from “exploratory,” and organize outputs by run_id, you will not fall into this kind of chaos later.
Case references:
This is not an isolated issue. When you use AI to quickly pile up a “runnable” repository but fail to isolate reusable code from one-off experimental entry points, the common ending is: every module must be rewritten, and almost all AI-generated fragments are replaced. Structure is the first line of defense against this kind of rework.
A Copy-and-Paste Directory Layout (Research-Friendly)
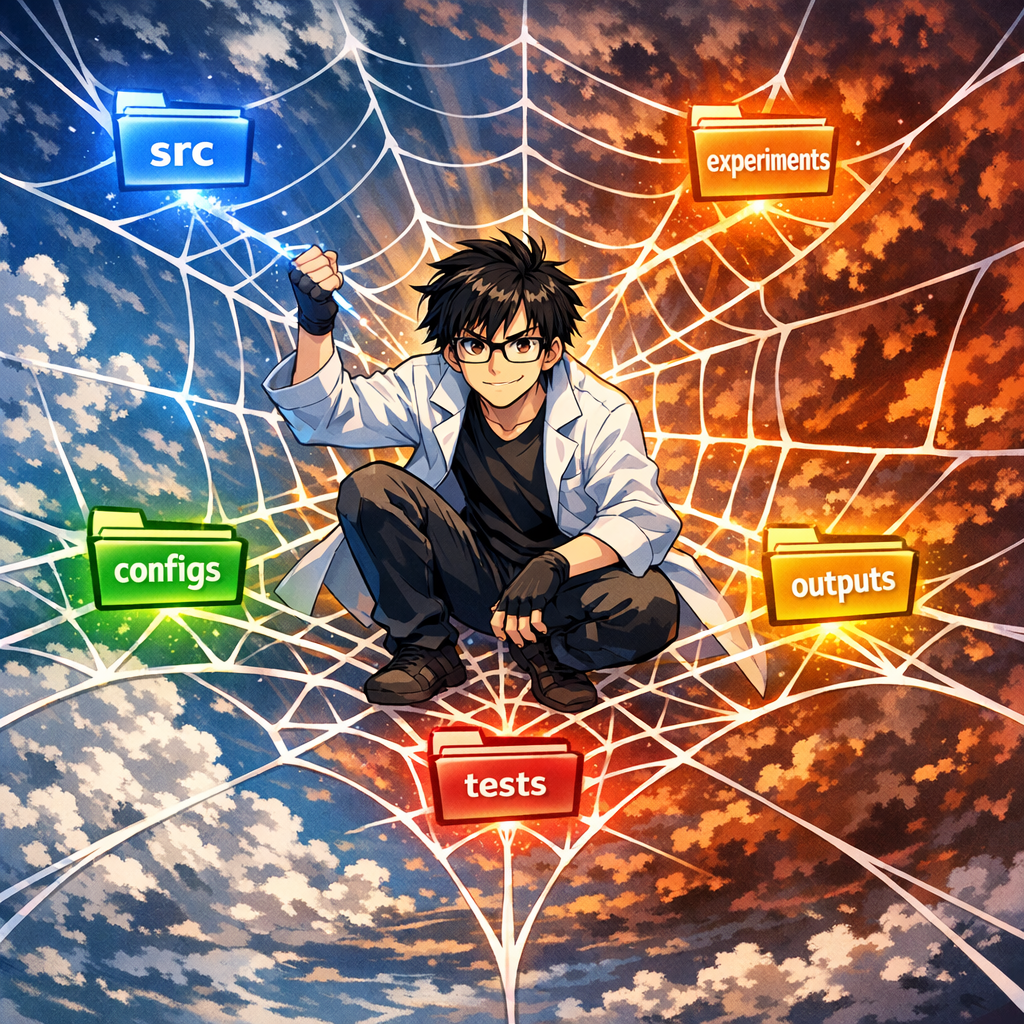
repo/
  src/                 # Core library: reusable, testable, maintainable (slow variables)
  experiments/         # Experimental entry points: one-off glue code (fast variables, disposable)
  configs/             # Unified configuration: yaml/json (diffable, traceable)
  data/                # Only pointers or small samples; manage large data externally
  outputs/             # Run artifacts: organized by run_id (cleanable/archivable)
  reports/             # Paper figures and conclusions: auto-generated from outputs
  scripts/             # Utility scripts for data prep/download/evaluation, etc.
  tests/               # Unit tests + smoke tests (hold the line)
  Makefile             # Common entry points: train/eval/reproduce/test
  README.md
  CLAUDE.md            # AI coding rules (recommended)
Fast Variables vs. Slow Variables: Separate “Stability” from “Exploration”
 It is recommended to divide the contents of a repository into two categories:
-
Slow variables (stable): parts that will be maintained long-term, reused repeatedly, and require test coverage.
-
Fast variables (explore): entry scripts for quickly testing a hypothesis, short-lived glue, and one-off analyses.
In this book’s terminology: src/ contains slow variables, and experiments/ contains fast variables.
Rule of thumb: exploration can be dirty, but the core library must be clean; exploration can be fast, but evaluation must be stable.
Why is this separation so important?
In my rewrite experience, the biggest pain point was being unable to distinguish assets from consumables. When all code is mixed together, you dare not delete anything (for fear of removing important functionality), and you also dare not refactor aggressively (for fear of affecting other experiments). Once you clearly define src/ as assets and experiments/ as consumables, the psychological burden is greatly reduced:
-
Changes to
src/must be made cautiously and require tests; -
Changes to
experiments/can be made freely—after the trial, delete it.
Definition of Done (DoD) for Each Directory
A directory name only truly reduces chaos when “what should go in” and “what should not go in” are sufficiently clear.
src/: Core Library (Reusable, Testable)

-
Store reusable modules: data loading, model components, losses, evaluation, general utilities.
-
Must be testable: at minimum, have smoke tests covering key pipelines.
-
No hard-coding: do not include paths/parameters that are only useful for a particular run.
Anti-example:
In my rewrite case, the original “data loading” code hard-coded the path and preprocessing for a specific experiment, forcing new experiments to copy-paste and modify it. If the paths and parameters had been passed in as function arguments from the start, this problem would not have occurred.
experiments/: Experimental Entry Points (Disposable)

-
Store only entry points and glue: short-lived is allowed; delete after use.
-
Any logic proven valuable and reusable should be migrated to
src/once it stabilizes.
Practical advice:
Name each experiment script by date or run_id, e.g., 2026-02-01_baseline.py. This makes it immediately obvious which experiments are old and which are new. Regularly (e.g., weekly) clean up scripts older than one month that have no value.
configs/: Configuration (Traceable)
-
Every “paper-candidate conclusion” must correspond to a config (or a traceable way to generate it).
-
A config must expand to the final parameters (avoid drift in default values).
outputs/: Artifacts (Cleanable/Archivable)
-
Store only run artifacts, and organize them by run_id.
-
No overwriting: do not reuse or manually modify the same run_id directory.
-
Archive important artifacts: move them into long-term storage; the repository should not carry large binaries.
reports/: Figures and Conclusions (Regenerable)
-
As much as possible, store only script-generated figures/tables and draft conclusions.
-
All figures and tables in the paper must be reproducible from
outputs/, avoiding manual drag-and-drop.
tests/: Testing (Hold the Line)
-
At least one 1–3 minute smoke test: run through data loading $\rightarrow$ forward pass $\rightarrow$ loss $\rightarrow$ evaluation.
-
Add assertions for critical functions: shape, NaN, value ranges, signals of data leakage, etc.
Converge Entry Points: Make “How to Run” Obvious

The most common waste in research is that others (including your future self) do not know how to run the code.
It is recommended to converge all commonly used entry points into a Makefile (or an equivalent task tool):
-
make test -
make train CONFIG=... -
make eval RUN=... -
make reproduce RUN=...
When entry points are few enough and stable enough, you can keep complexity internal while exposing reproducibility externally.
Progressive Refactoring: Migrating from a Messy Project to a Sound Structure
If you already have a “messy” legacy project, do not try to tear it down and rebuild everything at once. Below is a step-by-step refactoring process:
Step 1: Identify and Separate Slow Variables vs. Fast Variables
-
Review the existing code: Scan the entire project and mark which modules are core functionality (to be maintained long-term and reused repeatedly) and which are one-off experimental scripts.
-
Create new directories:
-
Create
src/and migrate modules that you are sure will be reused into it; -
Create
experiments/and move assorted run scripts and temporary code into it.
- Complete a coarse layering: After this step, the project structure will begin to look clearer, and the indexing burden in your head will be reduced accordingly. Perfection is not required; simply separate the obvious parts first.
Step 2: Extract Configurations and Parameters
-
Find hard-coded values: Scan the code and identify all hard-coded key parameters (learning rate, batch size, paths, etc.).
-
Create configuration files: Under
configs/, create YAML or JSON files to manage parameters centrally. -
Replace incrementally: Do not modify all code at once. Instead, refactor one script at a time, and proceed to the next only after confirming it runs correctly.
Practical experience:
During my refactoring, extracting configurations alone helped me uncover three hidden bugs—the “seemingly identical” parameters in different scripts actually had different values, making results incomparable.
Step 3: Standardize Output Paths
-
Define a convention: Decide to use the
outputs/<run_id>/structure. -
Modify the code: Adjust all experiment entry points so that outputs are archived by run_id.
-
Clean up old outputs: Organize or delete scattered legacy output files to keep the outputs directory clean.
Step 4: Add Basic Tests
-
Write a smoke test: Create a 1–3 minute quick test to verify that the core pipeline runs end-to-end.
-
Run after each refactor: Ensure changes do not break basic functionality.
-
Increase coverage gradually: As refactoring progresses, gradually add unit tests for critical functions.
Key principle:
Progressiveness matters. Do not attempt to finish all refactoring in one go; instead, ensure existing functionality remains intact at each step before moving on. My rewrite took three days, but if I had adopted progressive refactoring from the start, it could have been spread over a week without affecting the normal pace of experiments.
Directory Hierarchy Management for Multi-Task / Multi-Project Work
When facing multiple related but independent research tasks, how to organize directories becomes an important question.
Principle: Prefer Separate Repositories
Best practice: Use an independent code repository for each research project. This helps to:
-
Avoid dependency conflicts across projects;
-
Ensure independence in version control;
-
Simplify reproduction (each project has its own environment and dependencies).
Rule of thumb:
If two projects differ substantially in dependency versions, datasets, or runtime environments, strongly consider splitting into separate repositories.
Layered Structure for Multiple Projects in a Single Repository
If you truly need to manage multiple related tasks within one repository (e.g., multiple experiments for the same paper, or subprojects that share a large amount of code), you can adopt the following structure:
repo/
  projectA/
    src/
    experiments/
    configs/
    outputs/
    README.md
  projectB/
    src/
    experiments/
    configs/
    outputs/
    README.md
  common/
    src/               # Core code shared across projects
    tests/             # Tests for shared functionality
    scripts/           # General-purpose utility scripts
  README.md            # Overall description
  Makefile             # Cross-project common commands
Naming Conventions and Environment Isolation
-
Configuration file naming: Use project prefixes, e.g.,
configs/projectA_baseline.yaml,configs/projectB_ablation.yaml. -
Output directories: You may maintain outputs within each project subdirectory, or unify them at the repository root while using the project name as a prefix:
outputs/projectA/<run_id>/. -
Environment management: Even if the code lives in one repository, it is still recommended to maintain separate virtual environments or Docker containers for different projects to prevent dependency conflicts.
When to Share Code vs. When to Copy Code
When to share code into common/:
-
Basic utility functions needed by multiple projects;
-
General data loading or preprocessing logic;
-
Standardized evaluation metric computation.
When to copy code:
-
The code is still changing rapidly and requirements may diverge across projects;
-
Sharing would cause excessive coupling and harm independence;
-
The project is nearing completion and future synchronized updates are unlikely.
Practical recommendation:
At the beginning, prefer copying; extract into common/ only after the code is truly stable and you are confident it needs to be shared. Premature abstraction leads to frequent modifications of shared code and increases maintenance burden.
Quick Start: Use AI to Generate Your Repository Template
To speed up this process, your advisor suggests using an AI assistant. Simply describe the directory structure and files you need—for example, in one sentence to Claude:
“Generate a standard research project template with directories: src/, experiments/, configs/, outputs/, data/, reports/, scripts/, tests/. Include a README.md explaining each directory’s purpose and a Makefile with targets for test, train, eval, and reproduce.”
Within a minute, a complete project structure with all essential files is generated. You now have a solid foundation before writing a single line of code—a perfect example of “standing on the shoulders of giants.” Going forward, you decide to initialize every new project this way.
Why This Matters
Using AI to generate boilerplate is not lazy; it is structural wisdom. By outsourcing the tedious template creation, you ensure every project starts with best practices. The human effort is then focused on the unique science, not on redoing infrastructure.
A 10-Minute Action: “Layer Once” Your Current Project
If you do only one thing right now: roughly split the current repository into slow variables and fast variables.
-
Create
src/and move in modules you are sure will be reused. -
Create
experiments/and move all entry scripts into it, allowing them to be short-lived. -
Create
configs/and extract key parameters from scripts. -
Standardize all outputs into
outputs/<run_id>/.
You will immediately feel an increase in “controllability,” because you begin to distinguish what is an asset versus what is a one-off consumable.
From personal experience:
If I had established this structure when I first started using an AI coding assistant, the three-day rewrite could have been entirely avoided. A good structure is not for aesthetics; it is to stop forcing your brain to remember every detail, and to make the repository itself your reliable “second brain.”
Git Is Not for “Saving Code”; It Is for “Proving History”

Story Setup: Reviewers Ask for Reproducibility, but You Can’t Find the Code from Back Then

 Three months after submitting your paper, the reviews arrive. One comment is blunt: “Please provide the code and data; we would like to reproduce the results in Table 3.”
Your heart sinks-you quickly open the repository. But what you see makes your back go cold:
- The Git history contains only a handful of commits: “initial commit,” “update,” “fix bug,” “final version”;
- The results in the paper were produced three months ago, and you can no longer remember which version of the code was used;
- The code directory contains multiple versions of the training script:
train.py,train_v2.py,train_final.py, and you are not sure which one was used; - Worse still, you realize that you recently refactored the model code heavily for new experiments, and the current version can no longer reproduce the numbers reported in the paper.
You can only reply stiffly: “We are organizing the code and will provide it as soon as possible.” Then begins the painful “archaeology”-trying to reconstruct the code state from memory, chat logs, and experiment notes.
Does this scenario feel familiar?
Why “Casual Commits” Won’t Save You
Many people think they are using Git, but in practice they treat it as a “cloud drive”:
- They change a lot of code and commit everything at once, with a message like “update”;
- They never use branches; all changes accumulate on
main; - They only remember to commit after an experiment finishes-by then the code has already changed again;
- The commit history provides no clue as to “which version corresponds to which experimental result.”
The problem with this workflow is that you lose Git’s most essential value-the ability to serve as a “historical proof tool.”
In engineering, Git is primarily used for collaboration and rollback. In research, Git’s core value is proof:
- Proving which version of the code produced a given result;
- Proving that every experiment in the paper corresponds to a specific code version;
- Proving that you can return to any historical version and reproduce the same results.
Git Pitfalls in Research
Pitfall 1: Commits Are Too Coarse-Grained, and Key Changes Become Untraceable

Symptom: A single commit includes changes across a dozen files, spanning data processing, model architecture, training pipeline, and more. The commit message says only “improve model.”
Consequences:
- You cannot identify which change caused a metric to shift;
- When you want to roll back a faulty change, you find you cannot undo it in isolation;
- Months later, you cannot remember what the commit actually did.
Correct practice:
- Each commit should contain one logical change only;
- Commit messages should clearly state “what changed” and “why”;
- Follow the “atomicity principle”: every commit should keep the code in a runnable state.
Pitfall 2: Misalignment Between Experiment Timing and Code Changes

Symptom: You modify the code and run experiments first; the results look good; you commit two days later. Or you commit, then temporarily tweak a few parameters and rerun.
Consequences:
- The code version (commit) that produced the results does not actually match;
- Others (including your future self) attempt reproduction using the commit hash and obtain different results;
- When reviewers request reproduction, you cannot find the exact code version at all.
Correct practice:
- Commit first, then run the experiment;
- For each experiment, record the commit hash and dirty status in
run.json; - If you make temporary code changes, either recommit or document the dirty modifications in the run record.
Pitfall 3: Improper Branch Usage Leads to a Chaotic Mainline
 Symptom: All experiments are conducted on the
 main branch, mixing exploratory changes with stable code; or you create many branches but never clean them up, resulting in a tangled branch structure.
Consequences:
- The
mainbranch becomes unstable and filled with experimental code; - When you need the “paper reproduction version,” you do not know which branch to use;
- Too many branches leave team members unsure which branch to base new work on.
A Git Branching Strategy Suitable for Research
 Unlike engineering projects, a research project’s branching strategy must balance two needs:
- Stability: the paper’s results must be supported by a clean, stable code version;
- Exploration: new ideas require rapid trial-and-error and should not be constrained by heavy process.
Recommended Branch Structure
main (or stable):
  - Accept only validated changes
  - Every merge must pass the DoD check (see Chapter 5)
  - Ensure the paper results are reproducible at any time

exp/<hypothesis-name>:
  - One branch per experimental hypothesis
  - Use clear names: exp/attention-ablation, exp/data-augmentation
  - Short-lived branches: merge or delete after validation
  - Allow "dirty" rapid iteration

archive/<paper-version>:
  - Archive branches for key milestones such as submission and publication
  - Created from main; never merged back
  - Kept permanently to ensure traceability
Typical Workflow
Scenario 1: Validating a New Hypothesis
-
Create a new branch from main:
git checkout -b exp/new-loss-function -
Iterate quickly and trial-and-error on the branch; commits can be informal
-
After obtaining promising results, clean up the code
-
Create standardized experiment records (config +
run.json) -
Merge back into main:
git checkout main && git merge exp/new-loss-function -
Delete the experiment branch:
git branch -d exp/new-loss-function
Scenario 2: Paper Submission
-
Ensure all paper experiments on main are reproducible
-
Create an archive branch:
git checkout -b archive/icml2026-v1 -
Create a tag on main:
git tag -a paper-icml2026-v1 -m "ICML 2026 submission version" -
Push the tag:
git push origin paper-icml2026-v1
Scenario 3: Exploring Multiple Directions in Parallel
- Create multiple experiment branches simultaneously:
-
exp/architecture-search -
exp/data-augmentation -
exp/loss-function
-
Advance each branch independently without interfering with others
-
Manage each branch’s experimental artifacts using an independent run_id
-
Merge valuable changes back into main one by one
-
Delete branches with no value directly
Mark Milestones with Tags: Make Paper Results Permanently Traceable
 Tags are a severely underestimated feature in Git. For research projects, the value of tags lies in:
-
Assigning permanent markers to every key version of the paper;
-
Even as the main branch continues to evolve, you can precisely return to historical versions;
-
Provide clear version naming to facilitate citation and reproduction.
Recommended Tag Naming Conventions
# Paper versions
paper-<venue>-<version>
e.g.: paper-icml2026-v1, paper-icml2026-revision

# Experiment groups
exp-<experiment-name>
e.g.: exp-ablation-study, exp-baseline-comparison

# Primary results
result-<result-name>
e.g.: result-table3-main, result-fig2-comparison

# Milestones
milestone-<description>
e.g.: milestone-first-sota, milestone-reproducible-baseline
Tag Usage Practices
Tag each important experiment for the paper:
 # Tag immediately after finishing the main experiment
git tag -a result-main-experiment -m
# Tag immediately after finishing the main experiment
git tag -a result-main-experiment -m
“Main results reported in Table 2, config: configs/main.yaml”
# Record key information in the tag message
git tag -a result-ablation-study -m \
  "Ablation study results (Table 3)
   Run IDs: 2026-02-01_1030_ablation_*
   Config: configs/ablation_*.yaml
   Key finding: attention mechanism contributes 5% improvement"
When reproducing, switch directly to the tag:
# List all experiment-related tags
git tag -l "result-*"

# Switch to a specific experiment version
git checkout result-main-experiment

# Reproduce the experiment
make reproduce CONFIG=configs/main.yaml
Do Not Commit Experimental Artifacts to Git: Keep the Repository Clean with .gitignore
 Core principle: Git manages source code and configuration, not experimental artifacts.
What Should Not Be Committed to Git
-
Model weights: usually large (hundreds of MB to several GB); use dedicated model management tools (e.g., DVC, Git LFS, or cloud storage).
-
Training logs: all run artifacts under outputs/, organized by run_id and then archived or cleaned up.
-
Intermediate data: cached features, preprocessing outputs, etc.; these should be regenerable.
-
Datasets: raw data is typically managed externally; only keep small samples or data pointers (manifests, download scripts) under data/.
-
Virtual environments: directories such as venv/ and .conda/; use requirements.txt or environment.yaml instead.
Recommended .gitignore Template
# Python
__pycache__/
*.py[cod]
*$py.class
*.so
.Python

# Virtual environments
venv/
env/
.conda/

# Experimental artifacts
outputs/
runs/
checkpoints/
*.pt
*.pth
*.ckpt
*.h5

# Data (unless it is a small sample)
data/raw/
data/processed/
*.csv
*.parquet

# Logs
*.log
logs/
wandb/

# Temporary files
.DS_Store
*.swp
*.swo
*~

# IDE
.vscode/
.idea/
*.iml

# Exceptions: keep small sample data and configurations
!data/samples/
!configs/
Frequently Asked Questions and Solutions
Q1: The code has already changed a lot-how can I recover?
If your repository history is already very messy, do not try to “rewrite history” (unless you are very familiar with Git rebase). The recommended approach is:
-
Set a baseline point: tag the current state:
git tag baseline-before-cleanup -
Start enforcing conventions from now on:
-
Use an independent branch for each new experiment
-
Keep each commit atomic
-
Tag important results immediately
- Fix historical issues incrementally:
-
Identify the code versions corresponding to key paper experiments and add tags retroactively
-
Record the “mapping between historical versions” in the README or documentation
-
Use the standardized workflow for new experiments; trace old experiments as much as possible
Q2: How do we unify the branching strategy in team collaboration?
-
Write it into the README: document branch naming conventions and tag usage.
-
Set protection rules: on GitHub/GitLab, protect the main branch; forbid direct pushes and require PR/MR.
-
Code Review: before merging into main, check whether the DoD (Chapter 5) is satisfied and whether there is a complete experiment record.
-
Regular cleanup: hold a weekly meeting to collectively remove useless experiment branches and archive important tags.
Q3: How should we handle experiments in a “dirty” state?
Sometimes you temporarily modify code to run an experiment but have not had time to commit; this is a “dirty” state.
Recording strategy:
-
Record
"git_dirty": truein run.json -
Also record the diff:
git diff > outputs/<run_id>/changes.patch -
In run.md, note the temporary changes and the reasons
Post hoc remediation:
-
If the results are valuable, commit the changes immediately and add a tag
-
If it is only a temporary trial, recording it in run.md is sufficient; no need to commit
Practical Case: From Chaos to a Clear Git History
Before Refactoring (Negative Example)
* a3f2d1c (HEAD -> main) update
* f8d9e0a fix
* 1b2c3d4 add new feature
* 9e8d7f6 initial commit
No useful information can be inferred from the history, and none of the paper experiments can be matched to a corresponding version.
After Refactoring (Positive Example)
- d1e2f3g (tag: paper-icml2026-v1, main) Merge exp/final-ablation
| Paper results ready for submission
|
| * c4d5e6f (exp/final-ablation) Add ablation study for attention | * b3c4d5e Configure ablation experiments |/- a1b2c3d (tag: result-main-experiment) Main experiment: achieve 95.2% accuracy Run ID: 2026-02-01_1030_main_run Config: configs/main_experiment.yaml
- 9a8b7c6 (tag: milestone-baseline) Establish reproducible baseline All baseline experiments validated
- 8f7e6d5 Fix data preprocessing bug in train/val split
- 7e6d5c4 Add comprehensive smoke test
- 6d5c4b3 Refactor data loading module
A clear history: every critical milestone is tagged, enabling rollback at any time.
10-Minute Action: Establish a Git Baseline for the Current Project
If you do only one thing right now: establish a clear Git baseline for your project.
-
Check the current status:
git status git log --oneline -10 -
If there are uncommitted changes, decide how to handle them:
-
Valuable changes: clean them up and commit, with a clear message
-
Temporary experiments: record them in run.md, then
git stash -
Useless changes: revert with
git checkout .
-
Create a baseline tag for the current stable version:
git tag -a baseline-$(date +%Y%m%d) -m \ "Baseline before implementing git workflow" -
Set up a well-structured .gitignore:
# Use the template provided earlier curl -o .gitignore <template link> # Or create it manually git add .gitignore git commit -m "Add comprehensive .gitignore for research project" -
Document branch naming conventions: Add a section titled “Git Workflow” to README.md and record:
-
The purpose of the main branch
-
Naming conventions for exp/ branches
-
How to use tag
From this point onward, follow the conventions for branches and tag for every new experiment, so that Git truly becomes your “tool for proving history.”
From “It Runs” to “Trustworthy”: Only a Definition of Done Away

Story: The Cost of “Good Enough”

 At 2 a.m., you finally get a “pretty good-looking” result-test accuracy 94.3%, 3 percentage points higher than the baseline. Excited, you take a screenshot and post it to the team chat: “The new method works!”
Three days later, when you are ready to write the paper, you want to rerun the experiment to verify the result. You open the code and hesitate:
- Which configuration file did I use? There are three similar yaml files; I can’t remember.
- Which version of the data did I use? I think I temporarily changed the split once.
- What was the random seed? I forgot to record it.
- Was the code committed at the time? Or were there temporary local edits?
You bite the bullet and rerun it. The result comes out: 92.7%. That is 1.6 percentage points lower than before.
Your heart sinks-so which run is correct? Or are both unreliable?
The problem in this scenario is: you do not have a clear standard for judging whether “an experiment is done.”
In software engineering, there is a concept called Definition of Done (DoD)-the definition of completion. It answers: “When can I say this task is truly finished?”
In research, we also need a DoD, but with different standards:
- Engineering DoD: the code runs, tests pass, documentation is complete.
- Research DoD: results are trustworthy, reproducible, and comparable.
Why “It Runs” ≠ “Done”
In research, there are many situations that “look finished but actually plant landmines”:
Landmine 1: “Got a result” but cannot reproduce it
 Symptom: You see a good result, but lack complete records of the environment, configuration, and data version. A few days later, you try to rerun it and the numbers do not match.
Real cost:
- You panic when reviewers ask for reproducibility;
- Teammates cannot build on your results;
- Worst case: the paper is rejected because the “results are not reproducible.”
Landmine 2: “Improvement works” but you do not know why

Symptom: You changed three things at once. The result did improve, but you do not know which change mattered, and you did not run ablation experiments.
Real cost:
- You cannot answer when reviewers ask for a mechanistic explanation;
- You do not know what to keep or discard in subsequent iterations;
- You may mistakenly treat ineffective or even harmful changes as the key contribution.
Landmine 3: “Comparative experiments” but inconsistent evaluation protocol
 Symptom: Your method and the baseline use different evaluation scripts, or different post-processing. Your method appears better, but the comparison is actually unfair.
Real cost:
- Reviewers point out the unfair evaluation and ask you to redo it;
- After rerunning, the advantage disappears;
- You waste substantial time “equalizing” the evaluation.
DoD Checklist for Paper-Candidate Conclusions
The following checklist applies to any experimental result that “might go into the paper.” It is recommended to paste it verbatim into the project README as a team consensus.
Minimal DoD (5 mandatory items)

-
Reproduce the primary metric with a single command
  # For example:
  make reproduce RUN=2026-02-01_1030_main_experiment
  # Or:
  python reproduce.py --run_id=2026-02-01_1030_main_experiment
Starting from scratch (given the environment and data), it must be possible to reproduce the metrics reported in the paper with a single command (allowing minor fluctuations).
-
Complete run records
Each important experiment must have complete run records, including at least:
-
Git commit hash (code version)
-
Config file path and content (all hyperparameters)
-
Random seed
-
Data version (dataset version number, hash, or manifest file)
-
Environment summary (Python version, key library versions, GPU model, etc.)
A recommended format is the
run.jsontemplate in Chapter 6.
-
Baseline and ablation use the same evaluation script
All comparative experiments must:
-
Use exactly the same evaluation code;
-
Use exactly the same data split;
-
Use exactly the same post-processing;
-
Use consistent metric computation logic (e.g., the same thresholds and the same averaging scheme).
Acceptance criterion: you can point to a single unified evaluation script, and all methods’ metrics come from that script.
-
At least one smoke test runs in 1-3 minutes
A smoke test is a quick test that validates the core pipeline, aiming to catch obvious errors as early as possible.
Key components that must be covered:
-
Data loading (can read correctly and return data with correct shapes)
-
Model forward pass (does not crash; output shapes are correct)
-
Loss computation (values are reasonable; no NaN)
-
Evaluation pipeline (metrics are computed correctly)
Implementation suggestion: use a tiny data subset (e.g., 10 samples), run 2-3 iterations, and ensure the end-to-end pipeline is intact.
-
Figures are generated by scripts, not manual drag-and-drop
All figures in the paper must be automatically generated from the raw data in
outputs/.Prohibited practices:
-
Manually copying numbers from logs into Excel;
-
Manually adjusting chart styles and then taking screenshots;
-
Being unable to locate the source data files for figures.
Recommended practices:
-
Place generation scripts in the
reports/directory (e.g.,plot_main_results.py); -
Scripts read
outputs/<run_id>/metrics.jsonand generate figures; -
Save figures in an editable format (e.g., PDF) and save source data (e.g., CSV);
-
Add
make plotsto the Makefile to generate all figures with one command.
Enhanced DoD (recommended additional items)
 After meeting the minimal DoD, the following items can further improve result credibility:
-
Statistics over multiple runs
For experiments with substantial randomness, a single run is insufficient to demonstrate effectiveness. Recommended:
- Run with at least 3-5 different random seeds;
- Report mean and standard deviation (or confidence intervals);
- List the run_id corresponding to each seed in the run records.
-
Failure case analysis
Honestly document the limitations of the method:
-
Under what conditions does the method perform poorly?
-
Are there clear failure examples?
-
How sensitive is it to hyperparameters?
This not only increases credibility but also points the way for future improvements.
-
Complete ablation study
For methods that include multiple improvements, an ablation study must answer:
- How much does each improvement contribute on its own?
- Which improvements are critical and which are marginal?
- Are there interaction effects among improvements?
-
Code quality checks
Use automated tools to check code quality:
-
Linter (e.g., flake8, pylint): code style checks
-
Type checker (e.g., mypy): type checking
-
Unit test coverage: key functions must have tests
Run these checks automatically in CI.
-
Data leakage checks
Ensure strict separation between the training set and the test set:
-
Print sample counts before splitting and verify totals are consistent;
-
Check whether the training and test sets overlap (using sample IDs or hashes);
-
Time-series data: ensure the test set is temporally later than the training set.
DoD Checklist: Operational Steps from “It Runs” to “It’s Trustworthy”

Do Immediately After Finishing an Experiment (5 minutes)
-
Record run information
# Automatically generate run.json (see Chapter 6 tools) python log_run.py --run_id `<id>` -
Manually write key information in run.md (no more than 5 lines)
- What is the hypothesis of this experiment?
- What are the main changes?
- What are the results (summarize in one sentence)?
- What is the next step?
- Are there any noteworthy risks or anomalies?
Do Before Starting to Write the Paper (30 minutes)
-
Reproducibility verification
Run the reproduction command in a new terminal (or a new environment):
make reproduce RUN=<run_id of the paper-candidate result>Check:
- Does it run smoothly (without errors)?
- Are the results within a reasonable range (difference no more than 1-2% or one standard deviation)?
- If the discrepancy is large, investigate the cause (environment, data, randomness).
-
Comparative experiment check
Check all methods to be compared:
   ls outputs/
   # Find all baseline and ablation run_id
Confirm:
-
Did they use the same evaluation script? (This can be confirmed via the script path or hash in run.json.)
-
Is the data split consistent?
-
Are the evaluation parameters consistent?
If inconsistencies are found, you must rerun some experiments to unify the evaluation protocol.
-
Run smoke tests
   make test
   # Or:
   pytest tests/test_smoke.py
Ensure the core pipeline has not been broken by subsequent changes.
-
Generate plots
make plotsCheck the generated plots:
- Do they reflect the latest experimental results?
- Are the numbers consistent with the run records?
- Are the axes and legends clear?
Do Before Paper Submission (1 hour)
-
Completeness self-check
Cross-check the DoD list item by item:
- Every experiment cited in the paper has a run_id
- Every run_id has a complete run.json
- All comparative experiments use the same evaluation script
- Smoke tests pass
- All plots can be generated via scripts
-
Create Git tags for key experiments
# Main experiment git tag -a result-main-table2 -m \ "Main results in Table 2, run_id: 2026-02-01_1030_main" # Ablation experiments git tag -a result-ablation-table3 -m \ "Ablation study in Table 3, run_ids: 2026-02-01_14*" # Push tags git push origin --tags -
Write reproduction documentation
In the README or a separate REPRODUCE.md, clearly specify:
-
Environment setup steps (a single command or script)
-
Data preparation steps (download, preprocessing)
-
Commands to reproduce each table/figure
-
Expected runtime and resource requirements
Example:
    # Reproduction Instructions

    ## Environment Setup
    conda env create -f environment.yaml
    conda activate research-env

    ## Data Preparation
    bash scripts/download_data.sh
    python scripts/preprocess.py

    ## Reproduce Main Experiment (Table 2)
    make reproduce RUN=2026-02-01_1030_main
    # Expected time: 2 hours (single V100 GPU)
    # Expected metric: accuracy 94.3% ± 0.5%

    ## Reproduce Ablation Experiments (Table 3)
    bash scripts/reproduce_ablation.sh
    # Expected time: 6 hours (single V100 GPU)
How Teams Use DoD

As a Merge Criterion
In team collaboration, DoD can serve as the threshold for merging code into the main branch:
- An experiment branch must meet the minimum DoD to be merged into main;
- During code review, the reviewer checks against the DoD checklist;
- Code that does not meet DoD cannot be merged and must be completed.
As a Handover Standard
When a project needs to be handed over (e.g., student graduation, team member departure), DoD ensures that knowledge is not lost:
- All important experiments have complete records, so new members can reproduce them;
- Code quality is ensured (tests and documentation);
- Data and models have clear storage and access instructions.
As a Self-Audit Standard
Even for individual projects, DoD helps you avoid “fooling yourself”:
- Regularly (e.g., weekly) check experiments that have not completed DoD and fill in missing records;
- Perform batch checks before writing the paper to avoid last-minute scrambling;
- Once the habit is formed, DoD becomes a natural workflow rather than an extra burden.
Common Obstacles and Solutions
Obstacle 1: “I’m just exploring right now; there’s no need to be so strict.”
Rebuttal: During exploration, you may lower the DoD standard, but you cannot have no standard at all.
Recommended “simplified DoD for the exploration phase”:
- No requirement for multiple-run statistics;
- No requirement for complete ablation studies;
- But must: record commit, config, and seed to ensure it can be rerun.
Once an experiment “seems valuable,” immediately upgrade to the full DoD.
Obstacle 2: “Meeting DoD takes too much time.”
Response: A one-time investment of 30 minutes yields:
- No need for emergency patch-ups during review (saves days);
- A clear baseline for subsequent improvements (saves repeated work);
- No anxiety about “not being reproducible” at submission time (reduces psychological burden).
Practical suggestions:
- Script the DoD checks to reduce manual operations;
- Add checks in Git pre-commit hooks (see Chapter 7);
- With proficiency, DoD will integrate into daily workflows and no longer be an extra cost.
Obstacle 3: “We already have experiment management tools (e.g., MLflow, W&B).”
Response: Tools are great, but DoD is a standard, not a tool.
Tools can help you:
- Automatically record run information (save time);
- Visualize experimental results (easy comparison);
- Store models and artifacts (convenient management).
But tools cannot replace:
-
Your definition of “what counts as done”;
-
Your checks on “whether the evaluation is fair”;
-
Your verification of “whether the code is reproducible”.
Recommendation: Combine the DoD checklist with tooling; for example, record a “DoD compliance status” field in the MLflow run.
10-Minute Action: Perform a DoD Check on the Current Best Result
If you do only one thing right now: perform a complete DoD check on your currently “most promising” experimental result.
-
Find the run_id for this experiment (if it does not exist, create one now)
-
Inspect the run records
# Check whether run.json exists ls outputs/<run_id>/run.json # If not, remediate immediately: # 1. Record the git commit: git log -1 --format="%H" # 2. Record the config file path # 3. Record the seed (if you remember it) # 4. Record the data version (check the data directory or logs) # 5. Record the environment: pip freeze > requirements_<run_id>.txt -
Attempt reproduction
# Switch to the recorded commit git checkout <commit_hash> # Re-run with the recorded config python train.py --config <config_path> --seed <seed> # Check whether the results are within a reasonable range -
Record the check results
Record the following in
outputs/<run_id>/dod_check.md:
-
Are the records complete?
-
Reproducible? (result discrepancy: )
-
Is the evaluation fair?
-
Are there tests?
-
Can the figures be generated?
- If issues are found, fix them immediately
-
Incomplete records: supplement run.json
-
Not reproducible: investigate discrepancies and rerun
-
Unfair evaluation: unify the evaluation script and rerun all comparative experiments
After completing this check, you will have a clear understanding of the credibility of this result. If it passes the DoD, you can confidently include it in the paper; if it does not, it is still early enough to fix it now.
Remember: finding problems early is better than finding them before submission; finding them before submission is better than finding them during review; finding them during review is better than being questioned after publication.
Experiment Logging Automation: What’s Missing Is Not Tools, but Default Behavior

Story Setup: “Archaeological Work” Three Months Later
Your paper has been accepted, but the reviewers request supplementary materials explaining the exact setup of a particular experiment in Table 4. You open the code repository and begin “archaeology”:
Step 1: Find the logs
You remember this experiment was run three months ago. You open the outputs/ directory and see a pile of date-named folders. The problem is that you cannot recall the exact date. You can only open them one by one to check whether the results correspond to that experiment.
Step 2: Find the configuration
You finally locate the result files, but there is no record of the configuration. You comb through the code history, trying to find the hyperparameters used at the time. In one commit you find a configuration that seems plausible, but you are not sure whether it was the final version-you remember temporarily changing the learning rate, but you do not remember what you changed it to.
Step 3: Find the data
The data path in the code is data/v2/, but your current data directory is data/v3/. You do not remember whether you switched dataset versions back then. You search your chat history for “data,” trying to find clues.
Step 4: Give up
After an entire afternoon of struggle, you decide to rerun the experiment. However, because the parameters are uncertain, the rerun results do not match what was reported in the paper. In the supplementary materials you can only write: “Due to the long time elapsed, some experimental details may be inaccurate.”
Reviewer’s reply: “We cannot accept a paper where the authors cannot reproduce their own results.”
This tragedy could have been avoided.
If you had spent 2 minutes recording key information at the end of the experiment, you would not have faced a nightmare three months later.
The issue is not a lack of tools (MLflow, W&B, and TensorBoard are all excellent), but rather the absence of logging as a default behavior: many people think, “This is just a quick try; no need to record it,” and then they keep trying and forget to log. In the end, even valuable experiments leave no trace.
A Two-Layer Logging Strategy: Machine-Precise + Human-Concise
The core challenge of experiment logging is balancing two needs:
-
Machines require complete and precise information (for reproducibility and automated analysis);
-
Humans require concise, readable summaries (for rapid review and decision-making).
With only machine logs (e.g., JSON), it is difficult for humans to quickly understand “what this experiment was trying to verify”; with only human logs (e.g., notes), machines cannot automatically reproduce and compare runs.
Solution: two layers of logs, each doing its own job.
Layer 1: Machine Log (run.json)
Purpose: Provide complete, structured information for reproducibility and automation.
Principles:
-
Automatically generated: does not rely on manual input; collected automatically by scripts;
-
Structured: JSON format, easy for programs to parse and query;
-
Complete: includes all key information required for reproduction.
Minimal field set (can be copied verbatim):
{
  "run_id": "2026-02-01_1630_ablation_lr",
  "timestamp": {
    "start": "2026-02-01T16:30:45",
    "end": "2026-02-01T18:45:12"
  **,
  "git": {
    "commit": "a1b2c3d4e5f6",
    "dirty": false,
    "branch": "exp/ablation-lr",
    "remote": "git@github.com:user/project.git"
  **,
  "config": {
    "path": "configs/ablation_lr.yaml",
    "hash": "sha256:abcd1234...",
    "resolved": {
      "model": "transformer",
      "learning_rate": 3e-4,
      "batch_size": 32,
      ...
    **
  **,
  "data": {
    "name": "dataset_v3",
    "path": "/data/project/v3",
    "hash": "sha256:ef567890...",
    "split": {
      "train": 8000,
      "val": 1000,
      "test": 1000
    **
  **,
  "environment": {
    "python": "3.11.7",
    "cuda": "12.1",
    "platform": "Linux-5.15.0-x86_64",
    "gpu": "NVIDIA A100-SXM4-40GB",
    "pip_freeze_hash": "sha256:12345678..."
  **,
  "random": {
    "seed": 42,
    "torch_seed": 42,
    "numpy_seed": 42,
    "python_seed": 42
  **,
  "metrics": {
    "val_loss": 0.123,
    "val_acc": 0.943,
    "test_loss": 0.145,
    "test_acc": 0.931,
    "training_time_hours": 2.25
  **,
  "artifacts": {
    "model": "outputs/2026-02-01_1630_ablation_lr/model.pt",
    "logs": "outputs/2026-02-01_1630_ablation_lr/train.log",
    "predictions": "outputs/2026-02-01_1630_ablation_lr/predictions.json",
    "plots": "outputs/2026-02-01_1630_ablation_lr/plots/"
  **
**
Explanation of key fields:
-
run_id: A unique identifier; recommended format is timestamp + short description (see Chapter 2).
-
git.commit: Code version; obtain via
git rev-parse HEAD. -
git.dirty: Whether there are uncommitted changes; check via
git diff-index --quiet HEAD --. If true, it is recommended to save the diff:git diff > changes.patch. -
config.resolved: The fully expanded final configuration, including all default values. This is important because defaults may change as the code evolves.
-
data.hash: A hash of the data version to ensure the data are exactly identical. You can compute a hash for the entire data directory with
sha256sum, or use tools such as DVC. -
environment.pip_freeze_hash: A hash of dependency versions, computed with
pip freeze | sha256sum. Avoid storing the fullpip freezeoutput (too long); store only the hash and the path to the original file. -
random.seed: All random seeds. Ensure that seeds are set for PyTorch, NumPy, and Python’s built-in
random.
Layer 2: Human Log (run.md)
Purpose: Provide a concise summary of the experiment for humans (including your future self) to enable rapid understanding.
Principles:
-
Concise: No more than 10 lines; key information should be immediately clear.
-
Structured: Organize using a fixed set of five elements.
-
Handwritten: Allow subjective judgment and insights.
Five-element template (5 lines are enough):
# Run: 2026-02-01_1630_ablation_lr

## Hypothesis
Test the effect of learning rate on convergence speed and final performance. Expectation: a smaller learning rate (1e-4) will be more stable.

## Change
Compared with the baseline (lr=3e-4), reduce the learning rate to 1e-4; keep other hyperparameters unchanged.

## Result
-
Slower convergence (from 50 epochs to 80 epochs)
-
Slightly improved final performance (val_acc: 0.943 vs 0.938)
-
More stable training; no obvious oscillations in the loss curve
Next
Try an intermediate value of 2e-4, which may balance speed and performance. Consider a learning rate warmup strategy.
Risk/Anomalies
No obvious anomalies. Data augmentation may need coordinated adjustment (currently fixed).
Why only 5 lines?
-
Lower the logging barrier: If you have to write a long document, you will procrastinate; with 5 lines, you can finish in 2 minutes.
-
Force distillation of the core: Compels you to think about “what exactly did this experiment validate,” rather than producing a chronological narrative.
-
Fast review: Months later, a 5-line summary is more useful than a full log.
Automation Tools: Make Logging a Zero-Cost Behavior
Core idea: Logging should not depend on “remembering to do it”; it should happen automatically.
Automatically Generate run.json in the Training Script
Example implementation (Python):
import json
import subprocess
import hashlib
from pathlib import Path
from datetime import datetime

def log_run(run_id, config, metrics, output_dir):
    """
    Automatically log experiment information to run.json

    Args:
        run_id: Unique experiment identifier
        config: Configuration dictionary (resolved/expanded)
        metrics: Final metrics dictionary
        output_dir: Output directory path
    """
    run_info = {
        "run_id": run_id,
        "timestamp": {
            "start": datetime.now().isoformat(),
        **,
        "git": get_git_info(),
        "config": {
            "resolved": config,
            "hash": hash_dict(config),
        **,
        "data": get_data_info(config.get("data_path")),
        "environment": get_env_info(),
        "random": get_random_seeds(config),
        "metrics": metrics,
        "artifacts": {
            "model": str(output_dir / "model.pt"),
            "logs": str(output_dir / "train.log"),
        **
    **

    # Save to file
    run_file = output_dir / "run.json"
    with open(run_file, "w") as f:
        json.dump(run_info, f, indent=2)

    print(f"Run info logged to {run_file**")

def get_git_info():
    """Retrieve git information"""
    try:
        commit = subprocess.check_output(
            ["git", "rev-parse", "HEAD"]
        ).decode().strip()

        # Check for uncommitted changes
        subprocess.check_call(
            ["git", "diff-index", "--quiet", "HEAD", "--"]
        )
        dirty = False
    except subprocess.CalledProcessError:
        dirty = True

    branch = subprocess.check_output(
        ["git", "rev-parse", "--abbrev-ref", "HEAD"]
    ).decode().strip()
remote = subprocess.check_output(
            ["git", "config", "--get", "remote.origin.url"]
        ).decode().strip()

        return {
            "commit": commit,
            "dirty": dirty,
            "branch": branch,
            "remote": remote
        **

    def get_data_info(data_path):
        """Retrieve dataset information"""
        data_path = Path(data_path)

        # Compute a hash of the data directory (simplified; in practice, DVC can be used)
        # This is only an example; in real scenarios, it is recommended to use a dedicated data versioning tool

        return {
            "name": data_path.name,
            "path": str(data_path.absolute()),
            # "hash": compute_dir_hash(data_path),  # Optional
        **

    def get_env_info():
        """Retrieve environment information"""
        import sys
        import platform

        env = {
            "python": sys.version.split()[0],
            "platform": platform.platform(),
        **

        # Retrieve the CUDA version (if available)
        try:
            import torch
            env["cuda"] = torch.version.cuda
            env["pytorch"] = torch.__version__
            if torch.cuda.is_available():
                env["gpu"] = torch.cuda.get_device_name(0)
        except ImportError:
            pass

        # Save pip freeze to a separate file
        pip_freeze = subprocess.check_output(
            ["pip", "freeze"]
        ).decode()
        pip_file = Path("requirements_freeze.txt")
        pip_file.write_text(pip_freeze)

        env["pip_freeze_hash"] = hashlib.sha256(
            pip_freeze.encode()
        ).hexdigest()[:16]

        return env

    def get_random_seeds(config):
        """Extract random seeds"""
        return {
            "seed": config.get("seed", None),
            "torch_seed": config.get("torch_seed", None),
            "numpy_seed": config.get("numpy_seed", None),
        **

    def hash_dict(d):
        """Compute a hash of a dictionary"""
        import json
        return hashlib.sha256(
            json.dumps(d, sort_keys=True).encode()
        ).hexdigest()[:16]
Usage in the training script:
    # train.py

    import argparse
    from pathlib import Path
    from run_logger import log_run  # The utility above

    def main():
        args = parse_args()

        # Create run_id and the output directory
        run_id = f"{datetime.now().strftime('%Y-%m-%d_%H%M')**_{args.exp_name**"
        output_dir = Path("outputs") / run_id
        output_dir.mkdir(parents=True, exist_ok=True)

        # Load and resolve the configuration
        config = load_config(args.config)
        config = resolve_config(config, args)  # Resolve all default values

        # Set random seeds
        set_random_seeds(config["seed"])

        # Train the model
        model, metrics = train_model(config, output_dir)

        # Automatically log experiment information
        log_run(
            run_id=run_id,
            config=config,
            metrics=metrics,
            output_dir=output_dir
        )

        # Prompt to write run.md
        print(f"\n{'='*60**")
        print(f"[OK] Experiment completed: {run_id**")
        print(f"[NOTE] Please write a brief summary in:")
        print(f"    {output_dir / 'run.md'**")
        print(f"{'='*60**\n")

    if __name__ == "__main__":
        main()
Simplify run.md writing with a template
Automatically generate a run.md template in the output directory:
def create_run_md_template(output_dir, run_id):
    """Create a run.md template"""
    template = f"""# Run: {run_id**

## Hypothesis
[What does this experiment aim to validate? What are the expected results?]

## Change
[Compared with the previous experiment, what was changed?]

## Result
[What were the experimental results? Any unexpected findings?]

## Next
[Based on these results, what is the next step?]

## Risk/Anomaly
[Are there any notable anomalies or risks?]
"""

    md_file = output_dir / "run.md"
    if not md_file.exists():
        md_file.write_text(template)
        print(f"[NOTE] run.md template created at {md_file**")
In this way, after each experiment ends, you only need to fill in the blanks rather than writing from scratch.
Integration with Existing Tools
Integration with MLflow
If you are already using MLflow, you can synchronize the run.json information to MLflow:
import mlflow

def log_to_mlflow(run_info):
    """Log run.json information to MLflow"""
    with mlflow.start_run(run_name=run_info["run_id"]):
        # Log parameters
        mlflow.log_params(run_info["config"]["resolved"])

        # Log metrics
        mlflow.log_metrics(run_info["metrics"])

        # Log environment information
        mlflow.log_dict(run_info["environment"], "environment.json")

        # Log git information
        mlflow.set_tag("git.commit", run_info["git"]["commit"])
        mlflow.set_tag("git.branch", run_info["git"]["branch"])
        mlflow.set_tag("git.dirty", run_info["git"]["dirty"])

        # Log artifacts
        mlflow.log_artifact(run_info["artifacts"]["model"])
Integration with Weights & Biases
import wandb

def log_to_wandb(run_info):
    """Log run.json information to W&B"""
    wandb.init(
        project="my-research",
        name=run_info["run_id"],
        config=run_info["config"]["resolved"],
        tags=[run_info["git"]["branch"]]
    )

    # Log metrics
    wandb.log(run_info["metrics"])

    # Log environment and git information
    wandb.config.update({
        "git_commit": run_info["git"]["commit"],
        "git_dirty": run_info["git"]["dirty"],
        "python_version": run_info["environment"]["python"],
    **)

    # Save the model
    wandb.save(run_info["artifacts"]["model"])
Key point: Tools are auxiliary; the core is the standardization of recording. Even without MLflow/W&B, run.json and run.md are sufficient.
Log Querying and Analysis
With a structured run.json, you can quickly query and compare experiments:
Finding the Best Experiments
# find_best_run.py

import json
from pathlib import Path

def find_best_runs(metric="test_acc", top_k=5):
    """Find experiments with the best metric values"""
    runs = []

    for run_dir in Path("outputs").iterdir():
        if not run_dir.is_dir():
            continue

        run_json = run_dir / "run.json"
        if not run_json.exists():
            continue

        with open(run_json) as f:
            run_info = json.load(f)

        if metric in run_info.get("metrics", {**):
            runs.append({
                "run_id": run_info["run_id"],
                metric: run_info["metrics"][metric],
                "config": run_info["config"]["resolved"]
            **)

    # Sort
    runs.sort(key=lambda x: x[metric], reverse=True)
print(f"Top {top_k} runs by {metric}:")
        for i, run in enumerate(runs[:top_k], 1):
            print(f"{i}. {run['run_id']}: {run[metric]:.4f}")
            print(f"   Config: lr={run['config'].get('learning_rate')}, "
                  f"bs={run['config'].get('batch_size')}")

        return runs[:top_k]

    if __name__ == "__main__":
        find_best_runs()
Comparing Configuration Differences Between Two Experiments
# compare_runs.py

import json
from pathlib import Path

def compare_runs(run_id1, run_id2):
    """Compare the configurations and results of two experiments"""
    run1 = load_run(run_id1)
    run2 = load_run(run_id2)

    print(f"Comparing {run_id1} vs {run_id2}\n")

    # Compare configurations
    config1 = run1["config"]["resolved"]
    config2 = run2["config"]["resolved"]

    print("Configuration differences:")
    for key in set(config1.keys()) | set(config2.keys()):
        val1 = config1.get(key, "N/A")
        val2 = config2.get(key, "N/A")
        if val1 != val2:
            print(f"  {key}: {val1} -> {val2}")

    # Compare metrics
    print("\nMetrics:")
    metrics1 = run1.get("metrics", {})
    metrics2 = run2.get("metrics", {})
    for key in set(metrics1.keys()) & set(metrics2.keys()):
        val1 = metrics1[key]
        val2 = metrics2[key]
        diff = val2 - val1
        print(f"  {key}: {val1:.4f} -> {val2:.4f} "
              f"({diff:+.4f}, {diff/val1*100:+.2f}%)")

def load_run(run_id):
    """Load experiment information"""
    run_json = Path("outputs") / run_id / "run.json"
    with open(run_json) as f:
        return json.load(f)

if __name__ == "__main__":
    import sys
    if len(sys.argv) != 3:
        print("Usage: python compare_runs.py <run_id1> <run_id2>")
        sys.exit(1)

    compare_runs(sys.argv[1], sys.argv[2])
Frequently Asked Questions and Solutions
Q1: What if run.json is too large?
Problem: If you save the full config (including model definitions, data preprocessing details, etc.), run.json may become very large.
Solutions:
-
Save only the “key hyperparameters” in run.json (e.g., learning rate, batch size);
-
Save the full config to a separate file:
config_resolved.yaml; -
In run.json, record only the config file path and its hash.
Q2: What if you forgot to write run.md?
Solutions:
- Add a check in the Makefile or scripts:
if [ ! -f outputs/$RUN_ID/run.md ]; then
    echo "Warning: run.md not found for $RUN_ID"
    echo "Please write a summary before continuing."
fi
-
Periodically (e.g., every Friday) check which experiments are missing run.md and fill them in in a batch.
-
If you truly cannot recall, write “forgotten”-it is still better than having no record.
Q3: What if the data version is too large to compute a hash?
Solutions:
-
Use a data versioning tool (e.g., DVC, Git LFS);
-
Or record only a “manifest file” of the data:
# Generate a manifest
find data/ -type f | xargs sha256sum > data_manifest.txt

# Compute the manifest hash
sha256sum data_manifest.txt
- Record the manifest file path and hash in run.json.
10-Minute Action: Set Up Automatic Logging for Your Next Experiment
If you do only one thing right now: build a minimal system for automatic logging.
-
Copy run_logger.py
Copy the earlier
log_runfunction into your project. -
Call it at the end of the training script
# After training finishes
log_run(run_id, config, metrics, output_dir)
- Create a run.md template
create_run_md_template(output_dir, run_id)
-
Run one experiment as a test
Run an experiment and confirm:
-
outputs/<run_id>/run.json is generated automatically
-
The
outputs/<run_id>/run.mdtemplate has been generated. -
The information in
run.jsonis complete (git, config, env, metrics).
-
Fill in
run.mdSpend 2 minutes completing the five-element template.
Starting from the next experiment, logging will be automatic and zero-cost. The only thing you need to do is spend 2 minutes writing a 5-line summary-an investment that will yield a hundredfold return three months later.
After an AI Coding Assistant Joins, the Workflow Must Be Upgraded

Story Setup: When AI Turns from an Accelerator into a Landmine Factory
You spent a month rapidly building a complex multimodal learning framework with the help of Copilot. The code generation speed was astonishing—previously you could write 200 lines a day; now you could write 500 lines in half a day. You felt your productivity had multiplied severalfold.
But in the week before preparing your paper, problems began to erupt all at once:
Problem 1: Hidden Bugs
While testing an edge case, you found the model output NaN. Tracing the code back, you discovered an issue in a data preprocessing function—it would divide by zero in some rare cases. This function was generated by Copilot; at the time, you only checked that it “ran” and did not carefully review the boundary conditions.
Problem 2: Inconsistent Implementations
You found that data augmentation was implemented inconsistently between training and evaluation: training used version A generated by Copilot, while evaluation used version B that you later wrote by hand. The two had subtle differences in normalization. This caused a mismatch between the training and test distributions, hurting performance.
Problem 3: Overly Complex Architecture
For the sake of “elegance,” you had Copilot help you design a highly abstract architecture with many layers of abstract classes and factory patterns. Now you needed to quickly modify a feature, only to find you had to change five files because the logic was scattered across abstraction layers.
Problem 4: Missing Validation
You realized that much of the code generated by Copilot had no test coverage. You had been relying on “as long as it runs,” and had never systematically validated edge cases, error handling, or data consistency. Now that you wanted to add tests, you found the code was too tightly coupled to test in isolation.
Moment of Realization
You had to stop all new feature development and spend a week:
- Reviewing all AI-generated code to uncover hidden issues;
- Unifying inconsistent implementations;
- Simplifying the over-engineered architecture;
- Adding missing tests and validation.
You realized: the AI coding assistant is not the problem; the problem is that your workflow did not keep up.
Before AI joined, your codebase was smaller and had fewer errors; you could control quality through memory and experience. But now the code volume has exploded, while your validation mechanism is still stuck at the “manual review” stage—and this gap will only grow.
Three Major Pitfalls of AI Coding
Pitfall 1: Generation Speed Outpaces Validation Capacity
Symptom: AI generates 100 lines of code in a minute, and you accept it because it “looks fine.” But you have not carefully checked boundary conditions, error handling, or performance impact.
Consequences:
- A large number of hidden bugs are planted and surface at critical moments;
- The codebase fills with implementations that “run but are not robust”;
- Refactoring costs far exceed the cost of doing it right from the start.
Root cause: The validation mechanism has not been upgraded and remains at the “manual review” stage.
Pitfall 2: Repeated Generation Leads to Inconsistency
Symptom: When you need similar functionality, you ask AI to regenerate it instead of reusing existing code. As a result, the project contains multiple implementations that are “similar but not exactly the same.”
Consequences:
- Changing one piece of logic requires changes in multiple places, and omissions are likely;
- Different implementations may have subtle differences, leading to inconsistent results;
- The codebase bloats and maintenance costs surge.
Root cause: Failure to distinguish between “core library code” and “one-off glue code” (review Chapter 3).
Pitfall 3: Overreliance on “Quickly Tweaking It While I’m Here”
Symptom: When asking AI to implement a feature, you also casually ask it to “change this too” or “optimize that as well.” A single commit includes changes across more than a dozen files.
Consequences:
- You cannot pinpoint which change caused the problem;
- When you want to roll back, you find that “pulling one thread moves the whole fabric”;
- The code history becomes chaotic, and the evolution of logic is no longer traceable.
Root cause: Changes are no longer “the smallest verifiable unit” (review Chapter 1).
The Upgraded Workflow: Treat AI as a “Junior Programmer for Rapid Trial and Error”
Core idea: AI is an assistant, not a replacement. Its strength is rapidly generating a first draft; your responsibility is to validate, integrate, and gatekeep.
Treat AI coding as a two-stage process:
- Generation stage: AI quickly produces a first draft (fast, rough, allowed to have issues);
- Validation stage: Humans review, test, and refactor (slow, strict, ensuring quality).
Key principle: Generation can be fast, but shipping must be slow.
Principle 1: Make Only One Verifiable Change at a Time
Operational recommendations:
- Each time, limit AI-generated code to no more than a 200-line diff;
- Each change should involve only one logical function (e.g., “add data augmentation,” “fix NaN bug”);
- The change must be independently verifiable (with corresponding tests or experiments).
Practical example:
Counterexample:
# A single change includes:
- Modify data loading logic
- Add a new model layer
- Adjust training hyperparameters
- Refactor evaluation code
- Update configuration files
Result: if experimental results worsen, you cannot determine which change caused it.
Positive example:
# Change 1 (independent commit):
-
Modify data loading logic
-
Test: data loading tests pass; output shape is correct
Change 2 (independent commit):
-
Add a new model layer
-
Test: model forward-pass tests pass
Change 3 (independent commit):
-
Run experiments; compare the new model with the baseline
-
Record: run_id, metrics, conclusions
Principle 2: Attach “How to Verify” to Every Change
Operational recommendations:
When asking AI to generate code, also require it to generate verification code.
Example prompt:
Please implement data augmentation, including:
- Implementation code
- Unit tests (at least covering normal cases and edge cases)
- Usage examples
- Potential risk points
Verification checklist (check after every change):
- The code runs (does not crash)
- Outputs match expectations (shape, numeric range, data type)
- Edge cases are handled correctly (empty input, extreme values, invalid input)
- Existing functionality is not affected (regression tests pass)
- Test coverage exists (at least a smoke test)
Principle 3: Ban “Refactoring a Large Chunk While I’m Here”
Symptom identification:
Danger signals:
- AI suggests: “I’ll also refactor this part to make it more elegant”
- You think: “Since I’m changing it anyway, I might as well do it together”
- Result: one PR includes feature additions + refactoring + bug fixes
Correct approach:
-
Implement the feature first, refactor later:
# Step 1: implement the feature (rough is acceptable) git commit -m "feat: add data augmentation (rough version)" # Step 2: verify the feature is correct pytest tests/test_data_aug.py # Step 3: refactor independently (no functional changes) git commit -m "refactor: clean up data augmentation code" # Step 4: verify the refactor did not break functionality pytest tests/test_data_aug.py -
Separate refactoring from features:
-
Feature changes: use “feat:” or “fix:” in the commit message
-
Refactoring changes: use “refactor:” in the commit message
-
Never mix them together
Principle 4: Core logic must be manually reviewed
Definition of “core logic”:
The following code must not be accepted blindly in an AI-generated version; it must be carefully reviewed by a human:
- Data processing: data loading, preprocessing, splitting, augmentation
- Model core: loss functions, key modules (attention, normalization, etc.)
- Evaluation logic: metric computation, post-processing, threshold selection
- Randomness control: random seed configuration, random sampling logic
- Hyperparameters: learning-rate scheduling, weight decay, dropout rate
Review checklist:
- Logical correctness (is the algorithm implemented correctly?)
- Boundary conditions (what happens with empty data or extreme values?)
- Data consistency (are training and testing logic consistent?)
- Randomness (is the seed set correctly? is it reproducible?)
- Performance impact (will it be extremely slow? will memory blow up?)
Principle 5: Add minimal tests first, then modify core logic
Anti-pattern:
You: Copilot, help me refactor this data loading function
Copilot: [generates 150 lines of code]
You: Looks good, accept!
[A week later you discover the data loading is wrong, but you have already run many experiments]
Correct workflow:
# Step 1: Write tests for the existing code first
def test_data_loader_current():
    """Test the current data-loading behavior"""
    loader = DataLoader(...)
    batch = next(iter(loader))

    assert batch['image'].shape == (32, 3, 224, 224)
    assert batch['label'].shape == (32,)
    assert batch['label'].min() >= 0
    assert batch['label'].max() < num_classes

# Step 2: Run the tests and ensure they pass
pytest tests/test_data_loader.py

# Step 3: Refactor
[Copilot generates new code]

# Step 4: Run the tests and ensure behavior is unchanged
pytest tests/test_data_loader.py

# Step 5: If tests fail, fix or roll back
Benefits of test-first:
- Clarifies current behavior (as a baseline for regression tests)
- Quickly validates refactoring (1 minute instead of 1 hour of experiments)
- Avoids breaking existing functionality
- Forces you to think about “what the correct behavior is”
AI Rules Page (CLAUDE.md): Team consensus for collaboration
To standardize AI usage practices within a team, it is recommended to create CLAUDE.md (or AI_RULES.md) in the project root directory, clearly defining the boundaries and workflow for AI-assisted coding.
CLAUDE.md Template
# Guidelines for Using AI Coding Assistants

This project uses AI coding assistants (e.g., GitHub Copilot, Claude, GPT) to support development.
To ensure code quality and maintainability, all AI-generated code must follow the guidelines below.

## Core Principles
-
AI generates; humans are accountable: AI can quickly produce a first draft, but humans must review, test, and gatekeep.
-
Iterate in small steps: each change must not exceed a 200-line diff and must be independently verifiable.
-
Test first: before modifying core logic, add tests; after the change, tests must pass.
-
No opportunistic refactoring: functional changes and refactoring must be committed separately.
Operational Guidelines
1. Every change must include a verification method
Clearly specify in the commit message or PR description:
How to verify this change:
- Run tests: pytest tests/test_xxx.py
- Run experiments: python train.py –config xxx
- Check outputs: output shape should be [B, C, H, W]
    ### 2. Every change must document risk points

    ```
Potential risks:
- Modified data preprocessing, which may affect the data distribution
- Added new random operations; need to check seed settings
- Changed evaluation logic; need to rerun baseline to confirm fairness
### 3. Every change must have a rollback strategy

```bash
Rollback strategy:
- If tests fail: git checkout –
<file> - If experimental results degrade: revert to commit
<hash> - If other functionality is affected: roll back and create a new branch for isolated debugging
    ## Prohibited Behaviors

    [NO] **Prohibition 1: Blindly accepting large blocks of generated code**
      - Any AI-generated code exceeding 50 lines must be manually reviewed line by line
      - Core logic (data, model, evaluation) must be reviewed with extra rigor

    [NO] **Prohibition 2: Modifying too many files**
      - A single commit should not touch more than 5 files (except in special cases)
      - If many files must be changed, split into multiple commits

    [NO] **Prohibition 3: Merging without tests**
      - Before any code is merged into main, all tests must pass
      - If there are no relevant tests, tests must be added first

    [NO] **Prohibition 4: Direct changes on the main branch**
      - All AI-generated code must be validated on an experimental branch first
      - Merge into main only after validation passes

    ## Required Behaviors

    [YES] **Requirement 1: Test coverage for core logic**
      - Data loading, model core, and evaluation logic must have unit tests
      - After every modification to core logic, tests must pass

    [YES] **Requirement 2: Comparable experimental results**
      - Any change that affects results must be validated with comparative experiments
      - Record run_id and metric comparisons before and after the change

    [YES] **Requirement 3: Synchronized configuration versions**
      - Any change that affects results must update the corresponding config
      - Config files must be committed and tagged

    [YES] **Requirement 4: Documentation updated in sync**
      - API changes must update the documentation
      - New features must update the usage instructions in the README

    ## Acceptance Criteria (Before merging into main)

- [ ] Changes do not exceed 200 lines (or have been thoroughly discussed)
- [ ] All tests pass
- [ ] Core logic has been manually reviewed
- [ ] Clear commit messages
- [ ] Includes verification method, risk points, and rollback strategy
- [ ] If experimental results are affected, includes comparative experiment records

    ## Example: A good AI-assisted workflow

    ```bash
    # 1. Create an experimental branch
    git checkout -b exp/add-mixup

# 2. Have AI Generate the First Draft
    # [Copilot generates mixup data augmentation code]

    # 3. Manual Review and Revision
    # - Check boundary conditions
    # - Add type annotations
    # - Verify that random seed handling is correct

    # 4. Add Tests
    pytest tests/test_mixup.py

    # 5. Run Comparative Experiments
    make train CONFIG=configs/baseline.yaml  # baseline
    make train CONFIG=configs/mixup.yaml      # with mixup

    # 6. Record Results
    # outputs/2026-02-01_1030_baseline/run.json
    # outputs/2026-02-01_1100_mixup/run.json

    # 7. If Results Improve, Merge into main
    git checkout main
    git merge exp/add-mixup

    # 8. Clean Up the Experiment Branch
    git branch -d exp/add-mixup
    ```

    ## Reference Resources

- Repository structure conventions: see the "Project Structure" section in README.md
- DoD checklist: see DoD.md
- Experiment logging conventions: see LOGGING.md

---

    **Principle Summary: AI makes you faster, but it must not make you sloppier.**

## Practical Cases: The Correct Way to Use AI Assistance

### Case 1: Adding a New Model Component

##### Incorrect Approach:

    You: Copilot, help me implement a multi-head attention module
    Copilot: [generates 200 lines of code]
    You: Looks good—accept! Use it directly in training
    [training crashes; a bug is found in the attention computation]

##### Correct Approach:

    # Step 1: Generate a first draft
    You: Copilot, help me implement a multi-head attention module, including:
        - implementation code
        - unit tests
        - usage examples

    # Step 2: Manual review
- Check whether there is a division by sqrt(d_k) before softmax
- Check whether the mask implementation is correct
- Check whether the output shape matches expectations

    # Step 3: Write tests
    def test_multi_head_attention():
        attn = MultiHeadAttention(d_model=512, n_heads=8)
        x = torch.randn(32, 100, 512)  # (batch, seq, dim)
        out, weights = attn(x, x, x)

        assert out.shape == (32, 100, 512)
        assert weights.shape == (32, 8, 100, 100)
        assert torch.allclose(weights.sum(dim=-1),
                              torch.ones_like(weights.sum(dim=-1)))

    # Step 4: Test the module in isolation
    pytest tests/test_attention.py -v

    # Step 5: Test integration on a small dataset
    python train.py --config configs/test_attention.yaml \
                    --data_subset 100 --epochs 2

    # Step 6: After confirming everything is fine, run formal training
    python train.py --config configs/attention.yaml

### Case 2: Refactoring Data Loading

##### Incorrect Approach:

    You: This data loading code is a mess—Copilot, refactor it for me
    Copilot: [rewrites the entire DataLoader class]
    You: Great, use the new version!
    [rerun experiments; results differ from before, and it is unclear where the issue is]

##### Correct Approach:

    # Step 1: Write behavioral tests for the old version
    def test_old_data_loader_behavior():
        """Record the behavior of the old version as a baseline"""
        loader = OldDataLoader(...)
        batch = next(iter(loader))

        # Record key behaviors
        assert batch['image'].shape == (32, 3, 224, 224)
        assert batch['image'].dtype == torch.float32
        assert batch['image'].min() >= -1.0
        assert batch['image'].max() <= 1.0
        # ... more assertions

    # Step 2: Run the tests and ensure they pass
    pytest tests/test_data_loader.py::test_old_behavior -v

    # Step 3: Have AI refactor
    Copilot: [generates a new DataLoader]

    # Step 4: Write the same tests for the new version
    def test_new_data_loader_behavior():
        """Ensure the new version’s behavior is consistent"""
        loader = NewDataLoader(...)
        batch = next(iter(loader))

        # Same assertions
        assert batch['image'].shape == (32, 3, 224, 224)
        # ...

    # Step 5: Compare outputs from the two versions
    def test_output_consistency():
        """Directly compare outputs from the old and new versions"""
        old_loader = OldDataLoader(seed=42)
        new_loader = NewDataLoader(seed=42)

        old_batch = next(iter(old_loader))
        new_batch = next(iter(new_loader))

```python
torch.testing.assert_close(old_batch['image'],
                                   new_batch['image'])
# Step 6: If they match, then run the full experiment for verification
make reproduce RUN=baseline  # Use the old version
make train CONFIG=configs/baseline_new_loader.yaml  # Use the new version
# Compare the results
Common Issues and Solutions
Q1: The AI-generated code is too complex—I can’t understand it. What should I do?
Solution:
-
Refuse to accept it. Ask the AI to regenerate a simpler version.
-
Prompt:
Please implement feature XXX with the following requirements: - Keep the code simple and straightforward; avoid over-abstraction - Prefer the standard library and common patterns whenever possible - Add detailed comments explaining each step -
Remember: Code you cannot understand now will also be unintelligible to your future self—and even more so to others.
Q2: The AI-generated code has a bug; after fixing it, a new bug appears
Solution:
-
Do not repeatedly ask the AI to fix bugs and fall into an infinite loop.
-
The correct approach:
-
Write tests first to reproduce the bug
-
Fix the bug manually (small, localized changes)
-
After tests pass, consider whether refactoring is necessary
-
-
AI can suggest possible issues, but the fix should be done by humans.
Q3: What if team members do not follow the AI usage guidelines?
Solution:
-
Add automated checks in a Git pre-commit hook:
# .git/hooks/pre-commit #!/bin/bash # Check the number of lines in the commit diff DIFF_LINES=$(git diff --cached | wc -l) if [ $DIFF_LINES -gt 400 ]; then echo "Error: commit diff too large ($DIFF_LINES lines)" echo "Please split into smaller commits" exit 1 fi # Check whether there are tests if git diff --cached --name-only | grep -q "src/"; then if ! git diff --cached --name-only | grep -q "tests/"; then echo "Warning: you modified src/ but no test changes" echo "Please ensure tests are updated" fi fi # Run tests pytest tests/ -q || { echo "Error: tests failed" exit 1 ** -
Enforce it in CI (see the next section)
-
Enforce strict checks during code review
10-Minute Action: Establish Checkpoints for Your Next AI Coding Session
If you do only one thing right now: establish a minimal verification workflow for your next AI-assisted coding session.
-
Create
CLAUDE.mdCopy the template from this chapter and place it in the project root directory.
-
Write a smoke test
# tests/test_smoke.py def test_basic_training_loop(): """The basic training workflow can run end-to-end.""" config = load_config("configs/test.yaml") config["epochs"] = 2 config["data_subset"] = 100 model, metrics = train_model(config) assert metrics["train_loss"] > 0 assert not math.isnan(metrics["val_loss"]) -
Set up a pre-commit hook
# Simple version: only check tests echo '#!/bin/bash\npytest tests/ -q' > .git/hooks/pre-commit chmod +x .git/hooks/pre-commit -
Run one complete workflow
  # 1. Create an experiment branch
  git checkout -b exp/test-ai-workflow

  # 2. Ask the AI to make a small change (e.g., add a utility function)
  # 3. Write the corresponding tests
  # 4. Run tests
  pytest tests/test_xxx.py

  # 5. Commit (the hook will run automatically)
  git add .
  git commit -m "feat: add utility function X"

  # 6. If the hook passes, merge into main
  git checkout main
  git merge exp/test-ai-workflow
Starting from your next AI coding session, the default behavior should be: generate → review → test → verify → merge. This workflow will become muscle memory, ensuring that AI remains your accelerator rather than a landmine factory.
How to Explore Multiple Paths Without Turning Everything into a Garbage Heap

Story Introduction: From “Flexible Exploration” to “Afraid to Touch Anything”

Your research project has reached its third month. You are a diligent researcher and have tried many different directions:
-
Path A: Improve the model architecture (5 different attention mechanisms)
-
Path B: Optimize the training strategy (3 different learning-rate schedules)
-
Path C: Enhance data quality (4 preprocessing methods)
-
Path D: Adjust the loss function (6 different loss combinations)
You are excited-so much exploration! You will surely find an effective combination!
But when you open the project directory, what you see looks like this:
experiments/
  train_v1.py
  train_v2.py
  train_v2_fixed.py
  train_v3_final.py
  train_v3_really_final.py
  train_attention_test.py
  train_loss_ablation.py
  ... (20+ files)

outputs/
  run_0523/
  exp_new/
  test_attention/
  final_results/
  final_results_v2/
  backup_0601/
  temp/
  ... (50+ directories)

configs/
  config.yaml
  config_old.yaml
  config_backup.yaml
  config_test.yaml
  ... (15+ files)
The problems begin to surface:
Problem 1: You cannot find the best result
You remember that one experiment performed very well, but you cannot recall which config it used or which output directory it corresponds to. You start opening directories one by one, checking logs, trying to locate that result. Two hours later, you are still not sure whether you found the right one.
Problem 2: You dare not delete anything
outputs/ already occupies 50GB, but you do not dare delete any directory-what if the one you delete is exactly the experiment needed for the paper? You decide to “keep it for now; the disk is large enough anyway.”
Problem 3: You cannot compare different paths
 You want to compare the effects of “Path A (attention improvements)” and “Path B (learning-rate optimization),” but you discover that:
-
They use different baselines (one from three months ago, one from recently)
-
They use different evaluation scripts (one computes top-1, the other top-5)
-
The data split may also be different (you cannot remember clearly)
Problem 4: You cannot merge effective improvements
You find an effective improvement in Path A and want to port it to Path B, but you realize that:
-
The code in Path A and Path B has already diverged
-
The data-loading logic is incompatible
-
Merging requires substantial manual work
You realize: flexible exploration has turned into disorderly chaos, and parallel multi-path exploration has become a garbage heap.
Why Multi-Path Exploration Easily Gets Out of Control
The essence of research is uncertainty: you do not know which path will succeed, so you need to explore multiple directions simultaneously. However, without management mechanisms, the more you explore, the higher the degree of chaos.
Three Stages of Losing Control
Stage 1: Rapid Exploration (Weeks 1-4)
Behavior:
-
Try whatever comes to mind, without being constrained by conventions
-
Copy and paste code, change the name, and use it
-
Put outputs wherever convenient-“just get it running first”
Feeling: full of energy, rapid progress.
Stage 2: Path Divergence (Weeks 5-8)
Behavior:
-
Code across different paths begins to diverge, with less shared components
-
Each path has its own data processing, training scripts, and evaluation methods
-
New ideas are built on some old path rather than the mainline
Feeling: somewhat messy, but you can still remember the rough situation.
Stage 3: Uncontrolled Chaos (Week 9+)
Behavior:
-
You completely forget which experiment belongs to which path
-
You dare not delete anything; storage usage explodes
-
When you want to merge improvements, you find the paths are entirely incompatible
-
When preparing the paper, you rerun experiments and the results do not match your memory
Feeling: anxious, powerless, wanting to start over.
Root Cause: Lack of “Discardable” and “Mergeable” Mechanisms
The core challenges of multi-path exploration are:
-
You do not know which path will succeed, so you must explore multiple paths in parallel
-
You cannot keep everything, otherwise you will drown in an ocean of information
-
Successful paths must be merged back into the mainline, otherwise you cannot form a complete solution
If management mechanisms are missing:
-
Paths cannot be safely discarded (fear of deleting the wrong thing)
-
Paths cannot be easily merged (code divergence)
-
Paths cannot be clearly compared (inconsistent conditions)
Core Mechanisms: Isolation + Discardability + Comparability
Mechanism 1: Each Path Must Be Isolated
Three elements of isolation:
-
Independent Git branches
  exp/path-A-attention      # Path A: attention improvements
  exp/path-B-lr-schedule    # Path B: learning-rate optimization
  exp/path-C-data-aug       # Path C: data augmentation
  exp/path-D-loss-combo     # Path D: loss combinations
Benefits:
-
Code changes are independent and will not conflict
-
You can switch, compare, and merge at any time
-
Git history clearly records the evolution of each path
-
Independent configuration files
  configs/
    baseline.yaml              # Shared baseline
    path_A_attention.yaml      # Configuration for Path A
    path_B_lr_schedule.yaml    # Configuration for Path B
    path_C_data_aug.yaml       # Configuration for Path C
    path_D_loss_combo.yaml     # Configuration for Path D
Explicit inheritance relationships in the configs:
# path_A_attention.yaml base: baseline.yaml # Inherit the baseline configuration # List only the differences model: attention_type: "multi_head" # Change point num_heads: 8 experiment: name: "path_A_attention" hypothesis: "Multi-head attention is more effective than single-head attention" -
Independent output directories
outputs/ path_A/ 2026-02-01_1030_baseline/ 2026-02-01_1500_multi_head_attn/ 2026-02-02_0900_improved_attn/ path_B/ 2026-02-01_1100_baseline/ 2026-02-01_1600_cosine_schedule/ 2026-02-02_1000_warmup_schedule/ path_C/ …
Benefits:
-
The experimental results for each path are clearly grouped.
-
When deleting an entire path, you only need to delete the corresponding directory.
-
During archiving, you can package by path.
Mechanism 2: Explicit Lifecycle Management

Each exploration path should have a clearly defined lifecycle:
Create → Explore → Evaluate → Decide (keep/archive/delete)
Creation Phase
# 1. Create a branch
git checkout main
git checkout -b exp/path-E-new-idea

# 2. Create a configuration
cp configs/baseline.yaml configs/path_E_new_idea.yaml
# Edit the configuration and record the hypothesis

# 3. Create an output directory
mkdir -p outputs/path_E/

# 4. Record path information
cat > outputs/path_E/README.md <<EOF
# Path E: New Idea Exploration

## Hypothesis
[What hypothesis is this path intended to validate?]

## Baseline Comparison
Baseline for comparison: outputs/baseline/2026-02-01_1030_baseline
Expected improvement: [By how much is it expected to improve?]

## Key Changes
-
[Change 1]
-
[Change 2]
Start Date
2026-02-05
Status
Exploring EOF
Exploration Phase
Iterate freely on the branch and record each experiment:
# Run an experiment
python train.py --config configs/path_E_new_idea.yaml \
                --output outputs/path_E/2026-02-05_1030_try1/

# Record results (run.json is auto-generated; run.md is written manually)
# See Chapter 6

# Continue iterating
# Use a new run_id for each experiment; do not overwrite previous ones
Evaluation Phase
Periodically (e.g., weekly) evaluate the value of the path:
# Evaluation checklist

## Effectiveness Evaluation
-
Best result: [metrics]
-
Compared to baseline: [magnitude of improvement]
-
Stability: [variance across multiple runs]
Cost Evaluation
-
Time cost: [how much did training time increase?]
-
Compute cost: [does it require more resources?]
-
Complexity cost: [how much did code complexity increase?]
Insights Gained
-
What was discovered? [Even if it did not succeed, what was learned?]
-
Reasons for failure: [why did it not meet expectations?]
-
By-products: [any unexpected gains?]
Decision
[ ] Continue exploring (worth deeper investigation) [ ] Merge into mainline (successful) [ ] Archive (valuable but not the current focus) [ ] Delete (no value)
Decision Phase
Based on the evaluation results, make a clear decision:
Decision 1: Merge into mainline (path succeeds)
# 1. Clean up the code
# Ensure changes are minimal, clean, and testable

# 2. Run full verification
make test
make reproduce RUN=path_E/best_result

# 3. Merge
git checkout main
git merge exp/path-E-new-idea

# 4. Create a tag
git tag -a milestone-E-success -m \
  "Path E succeeded: the new idea improved baseline performance from X to Y"

# 5. Update baseline
cp outputs/path_E/best_result outputs/baseline/

# 6. Delete the experimental branch
git branch -d exp/path-E-new-idea

# 7. Update path status
echo "Status: Merged to main (2026-02-12)" >> outputs/path_E/README.md
Decision 2: Archive (valuable but not the current focus)
# 1. Create a tag to preserve the branch state
git tag -a archive/path-E-v1 -m \
  "Path E archived: preliminarily effective but requires more time to validate"

# 2. Organize artifacts
mkdir -p archives/path_E/
cp -r outputs/path_E/ archives/path_E/
cp configs/path_E_*.yaml archives/path_E/

# 3. Write a summary
cat > archives/path_E/SUMMARY.md <<EOF
# Path E Archive Summary

## Key Findings
[Summarize the key findings]

## Why Archive
[Explain why you are not continuing now, but why it is worth keeping]

## Conditions for Future Restart
[Under what circumstances is it worth exploring again?]

## References
-
Code version: git tag archive/path-E-v1
-
Best result: outputs/path_E/2026-02-10_1500_best/
-
Related papers: [external references] EOF
4. Delete the experimental branch (keep the tag)
git branch -d exp/path-E-new-idea
5. Delete outputs (already archived)
rm -rf outputs/path_E/
Decision 3: Delete (no value)
# 1. Final confirmation
# Check whether there are any valuable findings or code

# 2. Delete outputs
rm -rf outputs/path_E/

# 3. Delete configurations
rm configs/path_E_*.yaml

# 4. Delete the branch
git branch -D exp/path-E-new-idea  # -D forces deletion
5. Record Deletion Reasons (Optional but Recommended)
cat >> docs/EXPLORATION_LOG.md <<EOF
## Path E (Deleted, 2026-02-12)
- Hypothesis: [original hypothesis]
- Result: [why it failed]
- Lesson: [what was learned] EOF
Mechanism 3: A Baseline for Fair Comparisons
When comparing all paths, you must use the same baseline:
Establish the Baseline Experiment
# 1. Run the baseline experiment on the main branch
git checkout main
python train.py --config configs/baseline.yaml \
                --output outputs/baseline/2026-02-01_1030_baseline/

# 2. Verify that the baseline is reproducible
make reproduce RUN=baseline/2026-02-01_1030_baseline

# 3. Create a tag
git tag -a baseline-v1 -m "Common baseline for all paths"

# 4. Record baseline information
cat > outputs/baseline/INFO.md <<EOF
# Baseline Experiment Information

## Configuration
-
Config: configs/baseline.yaml
-
Commit: $(git rev-parse HEAD)
-
Tag: baseline-v1
Results
-
Val accuracy: 0.920
-
Test accuracy: 0.915
-
Training time: 2.5 hours
Purpose
The comparison baseline for all paths (A-Z). Any improvement from any path should be reported relative to this baseline.
Reproduction
make reproduce RUN=baseline/2026-02-01_1030_baseline EOF
Standardizing Path Comparisons
# Example comparison script
# compare_paths.py

import json
from pathlib import Path

def compare_to_baseline(path_name):
    """Compare the results of a given path against the baseline"""
    baseline = load_best_run("outputs/baseline")
    path = load_best_run(f"outputs/{path_name}")

    print(f"\n{'='*60**")
    print(f"Path comparison: {path_name} vs Baseline")
    print(f"{'='*60**\n")

    # Compare configuration differences
    print("Configuration differences:")
    diff_configs(baseline["config"], path["config"])

    # Compare metrics
    print("\nMetric comparison:")
    compare_metrics(baseline["metrics"], path["metrics"])

    # Compare costs
    print("\nCost comparison:")
    compare_cost(baseline, path)

    # Conclusion
    print("\nConclusion:")
    if is_improvement(path["metrics"], baseline["metrics"]):
        print(f"[OK] Path {path_name} successfully improves the baseline")
        print(f"   Recommendation: merge into the mainline")
    else:
        print(f"[NO] Path {path_name} fails to improve the baseline")
        print(f"   Recommendation: archive or delete")

if __name__ == "__main__":
    import sys
    compare_to_baseline(sys.argv[1])
Weekly Cleanup Ritual: Organizing the Experiment Graveyard
Core idea: Regular cleanup is the only way to avoid a junk heap.
Friday Afternoon Cleanup Procedure (30 minutes)

Step 1: List All Active Paths (5 minutes)

# list_active_paths.sh

echo "Active exploration paths:"
git branch | grep "exp/" | while read branch; do
    echo "  - $branch"
done

echo "\nOutput directory sizes:"
du -sh outputs/*/ | sort -rh
Step 2: Evaluate Paths One by One (15 minutes)
For each path, ask three questions:
- Has there been new progress this week?
-
Yes: keep it
-
No: is it paused or abandoned?
- Is there an improvement compared to the baseline?
-
Yes: does it meet the merge criteria?
-
No: is it still worth continuing?
- How many resources does it consume?
-
Output directory size
-
Code complexity
-
Maintenance cost
Step 3: Execute Cleanup Actions (10 minutes)
# Example cleanup script
# weekly_cleanup.sh

#!/bin/bash

echo "Starting weekly cleanup..."

# 1. Archive paths from two weeks ago (if there is a tag)
git tag -l "archive/*" | while read tag; do
    tag_date=$(git log -1 --format=%ai $tag | cut -d' ' -f1)
    # [archiving logic]
done

# 2. Delete outputs marked as "to_delete"
find outputs/ -name ".to_delete" -type f | while read marker; do
    dir=$(dirname $marker)
    echo "Deleting: $dir"
    rm -rf $dir
done
3. Compress outputs older than one month (if they still have value)
find outputs/ -type d -mtime +30 | while read dir; do
    if [ -f "$dir/run.json" ]; then
        echo "Compressing: $dir"
        tar -czf "${dir}.tar.gz" $dir
        rm -rf $dir
    fi
done

# 4. Report freed space
echo "\nCleanup complete!"
du -sh outputs/
Cleanup Decision Tree
For each path, determine:
+-- Any activity in the past two weeks?
    |
    +-- Yes -> Improvement vs. baseline?
    |        |
    |        +-- Yes (>5%) -> [Merge into mainline]
    |        +-- Yes (3-5%) -> [Continue monitoring]
    |        +-- No (<3%) -> [Consider abandoning]
    |
    +-- No -> Does it have archival value?
             |
             +-- Yes (unique insights) -> [Archive]
             +-- No -> [Delete]
Special cases:
- Disk usage >10GB -> prioritize handling (compress or delete)
- Has external references (e.g., paper drafts) -> do not delete for now; add a marker
- High code complexity -> if there is no clear value, prefer deletion
Path Merge Strategy: From Exploration to a Stable Mainline
Pre-merge Checklist
Before merging a path into main, ensure that:
[ ] Stable improvement vs. baseline (validated across multiple runs)
[ ] Minimal changes (retain only necessary modifications)
[ ] Clean, maintainable code (passes lint and review)
[ ] Test coverage (at least a smoke test)
[ ] Configuration clearly documented (reproducible)
[ ] Does not break existing functionality (regression tests pass)
[ ] Documentation updated (README, API docs)
Progressive Merge Strategy
For complex paths, do not merge everything at once. A step-by-step approach is recommended:
Example: Merging “Path A: Attention Improvements”
# Path A contains three changes:
# 1. A new attention mechanism
# 2. Improved positional encoding
# 3. Adjusted learning rate

# Do NOT merge all changes at once!

# Step 1: Merge the most core improvement first (attention)
git checkout main
git checkout exp/path-A-attention -- src/models/attention.py
git commit -m "feat: add improved attention mechanism from path A"

# Validate
make test
make train CONFIG=configs/main_with_new_attention.yaml

# Step 2: If Step 1 succeeds, merge positional encoding
git checkout exp/path-A-attention -- src/models/position_encoding.py
git commit -m "feat: add improved position encoding from path A"

# Validate
make test
make train CONFIG=configs/main_with_attention_and_pos.yaml

# Step 3: Finally merge hyperparameter adjustments
# [If the first two steps both succeed]
Benefits:
-
Each step can be validated independently
-
If a step fails, it does not affect other improvements
-
Git history clearly records each improvement
-
Easier to pinpoint issues
Frequently Asked Questions and Solutions
Q1: There are too many paths-what if I cannot keep track of them?
Solution: Maintain a path tracking table.
# docs/EXPLORATION_TRACKER.md
# Exploration Path Tracker
| Path | Status | Hypothesis | Best Result | Decision | Last Updated |
|------|--------|------------|-------------|----------|--------------|
| A-attention | In progress | Multi-head attention is more effective | 0.925 (+0.5%) | Continue | 2026-02-10 |
| B-lr-schedule | Archived | Cosine scheduling is better | 0.922 (+0.2%) | Not significant | 2026-02-08 |
| C-data-aug | In progress | MixUp improves generalization | 0.930 (+1.0%) | **Consider merging** | 2026-02-12 |
| D-loss-combo | Deleted | Multi-task loss helps | 0.918 (-0.2%) | Negative effect | 2026-02-05 |
| E-new-idea | Just started | [To be validated] | - | Explore | 2026-02-12 |

## Baseline
Baseline: 0.920 (outputs/baseline/2026-02-01_1030_baseline)

## Plan for Next Week
- Path A: complete ablation studies to confirm each component's contribution
- Path C: run more seeds to verify stability
- Path E: initial implementation and validation
Update this table weekly (5 minutes) to maintain a clear view of the status of all paths.
Q2: What if code conflicts arise across different paths?
Prevention is better than cure:
-
Whenever possible, have paths modify different modules (e.g., one changes data, another changes the model)
-
Keep shared core code in src/ and avoid modifying it lightly
-
Put path-specific changes in experiments/
When conflicts occur:
-
Do not force-merge multiple paths
-
Merge one path first; after it is validated, recreate other paths based on the new main
-
Or: reassess whether merging multiple paths is truly necessary
Q3: What if I regret deleting a path?
Preventive measures:
- Tag before deletion:
git tag -a deleted/path-X -m "Path X before deletion"
-
Write a brief summary before deletion (see “Deletion Decision” above)
-
Archive important data to inexpensive storage first (e.g., cloud)
Recovery method:
# If there is a tag, you can restore the code
git checkout deleted/path-X

# Recreate a branch from it
git checkout -b exp/path-X-restored
If the output has been deleted, check the archive or backup
ls archives/path_X/
10-Minute Action: Organize the Current Exploration Paths
If you do only one thing right now: inventory and categorize all current exploration paths.
-
List all branches and outputs
git branch | grep "exp/" ls outputs/ -
Quickly categorize each path
Write in your notes:
Path A (exp/xxx): [In progress | Archived | Deleted] - Hypotheses: - Status: - Decisions: Path B (exp/yyy): [In progress | Archived | Deleted] - ... -
Perform one cleanup pass
# Delete paths that are clearly not valuable git branch -D exp/failed-path-X rm -rf outputs/path_X/ # Archive valuable but inactive paths git tag -a archive/path-Y mkdir -p archives/path_Y/ mv outputs/path_Y/ archives/path_Y/ # Update status records for active paths -
Create a tracking table
Create
docs/EXPLORATION_TRACKER.mdto record all active paths. -
Schedule next week’s cleanup time
Add to your calendar: **Every Friday 17:00 - Exploration Path Cleanup (30 minutes)}
After completing this 10-minute action, you will immediately feel:
-
Greater control over the project status
-
Clarity on which paths are worth continuing and which should be abandoned
-
No longer worrying that the “junk pile” will spiral out of control
Remember: multi-path exploration is an essential feature of research, but unmanaged multi-path exploration becomes a disaster. Regular cleanup is not a burden; it is a necessary ritual for staying clear-headed.
Three Proactive Actions to Prevent a Last-Stage Blow-Up
Story Setup: The Nightmare of One Week Before the Deadline
On Monday morning, you check your calendar and your heart sinks—the paper submission countdown: 7 days.
You originally planned to do only “final polishing” this week: organize experimental results into figures and tables, write the related work, and check formatting once. It should be easy, right?
But when you start preparing the paper, problems come rushing in like an avalanche:
Monday: The Main Experiment Cannot Be Reproduced
You want to rerun the main experiment to confirm you did not misrecord the numbers. But after running the script, the results differ from three weeks ago—the accuracy drops from 94.3% to 92.1%.
You panic and begin troubleshooting:
-
Did the code change? The Git history is a mess, and you are not sure which version you used back then.
-
Did the data change? The data directory contains v1, v2, v3—you cannot remember.
-
Did the environment change? Did some dependency library auto-upgrade?
You spend an entire day and still cannot find the cause.
Tuesday: The Baseline Turns Out to Be Unfair
Reviewers will certainly focus on your comparison with the baseline. You check carefully and discover a fatal issue: your method uses the latest data preprocessing, but the baseline uses an older version. The evaluation protocol is not consistent at all.
You need to rerun the baseline—but that requires 6 hours of training time.
Wednesday: A Key Ablation Study Is Missing
Your advisor reads your first draft and points out: “Your method includes three improvements (A, B, C), but you did not explain how much each contributes. Reviewers will definitely ask.”
You realize you are missing an ablation study. You need to run:
-
baseline
-
baseline + A
-
baseline + B
-
baseline + C
-
baseline + A + B
-
baseline + A + C
-
baseline + B + C
-
baseline + A + B + C (full method)
Each experiment takes 2 hours; 8 experiments = 16 hours. But you have only 4 days left.
Thursday: The Data for Figures Cannot Be Found
You want to generate the paper’s figures, but you discover that the output files for a key experiment are gone—perhaps you accidentally deleted them, or they were lost during some cleanup. You only remember that “the results were good,” but the raw data is gone.
You have no choice but to rerun those experiments.
Friday: You Start Questioning Your Life Choices
You have not slept well for three days. Experiments are still running, the paper has not even started, and the figures are not finished. You begin to wonder: “Why do I always blow up at the last stage?”
The answer is simple: because you did not do three things in advance.
Why a “Last-Stage Blow-Up” Is Almost Inevitable
Looking back at Chapter 1, we said there are three kinds of debt in research:
-
Exploration debt: messy code, scattered outputs, unclear paths
-
Validation debt: weak baseline, missing ablations, unfair comparisons
-
Reproducibility debt: unfixed environments, incomplete configurations, unclear versions
If these debts accumulate in daily work, the final stage becomes a concentrated repayment period. And deadline pressure amplifies every problem:
-
Issues you could debug slowly now must be solved immediately
-
Experiments you could rerun now cannot be rerun due to lack of time
-
Questions you could ask others now go unanswered because everyone is busy
The harshest truth: if you discover problems only in the last week, in most cases it is already too late to fix them.
So what should you do? The answer is: expose problems early, solve them early, or at least know early that they exist.
Proactive Action 1: A Weekly “Reproducibility Self-Check” (15 Minutes)
Why It Matters
Core idea: you cannot wait until right before submission to discover that results are not reproducible. You must continuously verify reproducibility in day-to-day work.
If you do a self-check every week, problems will be discovered in the week they appear, rather than accumulating until the end.
Self-Check Checklist (Finish in 15 Minutes)
Item 1: Check Whether This Week’s Most Important Experiment Is Reproducible (5 Minutes)
# Find this week’s best/most important experiment
RUN_ID="this week’s best run_id"

# Check record completeness
[ ] outputs/$RUN_ID/run.json exists
[ ] run.json contains git commit
[ ] run.json contains the config path
[ ] run.json contains seed
[ ] run.json contains the data version
[ ] run.json contains environment information

# If any item is missing, remediate immediately
Item 2: Attempt a Quick Reproduction (5 Minutes)
You do not need to rerun everything (too slow), but you must verify that the pipeline runs end-to-end:
# Quick test with a small dataset
python train.py \
    --config outputs/$RUN_ID/config.yaml \
    --data_subset 100 \
    --epochs 2 \
    --seed 42

# Check:
[ ] starts normally
[ ] data loads correctly
[ ] model forward pass is correct
[ ] loss computation is normal
[ ] evaluation pipeline is correct
If even this 2-minute test cannot run through, full reproduction will definitely have issues. Fixing it now is still in time.
Item 3: Check Whether Dependencies Have Drifted (3 Minutes)
# Save current dependencies
pip freeze > requirements_$(date +%Y%m%d).txt

# Compare with last week’s dependencies
diff requirements_last_week_date.txt requirements_$(date +%Y%m%d).txt

# If there are changes, record them in CHANGELOG.md
Dependency changes are a common cause of reproducibility problems. Recording them weekly enables rapid localization when issues arise.
Item 4: Check Whether Outputs Are Properly Labeled (2 Minutes)
# Check whether this week’s outputs all have run_id
ls outputs/

# Check for temporary directories such as "unnamed", "temp", "test"
# If any exist, either delete them or give them formal names
Unlabeled outputs are “future traps”—you know what they are now, but you will forget a month later.
Frequency and Timing of the Self-Check
Recommended time: the last 15 minutes on Friday afternoon
Why Friday?
-
The week’s work is ending, making it easy to review comprehensively
-
If you do not work on weekends, you can rest with peace of mind (knowing the project is under control)
-
If you find problems, you can address them immediately on Monday
Special cases:
-
When you obtain results that “look good”: do the self-check immediately; do not wait until Friday
-
After modifying core code: do the self-check the same day
-
After switching data versions: do the self-check immediately
Common Pitfalls
Pitfall 1: “I remember it anyway; no need to check.”
Reality: two weeks later you will forget the details. Memory is unreliable; records are reliable.
Pitfall 2: “This is just a test; no need to record it.”
Reality: many “just a test” experiments later become the main results in the paper. If you did not record them at the time, you will regret it in the end.
Pitfall 3: “It runs, so it should be reproducible.”
Reality: “it runs” and “it can be reproduced on another machine/in another environment/two months later” are completely different things.
Proactive Action 2: A Monthly “Debt Inventory” (30 Minutes)
Why It Matters
The weekly self-check addresses whether “recent experiments can be reproduced,” but there are deeper issues:
- How much exploration debt does the entire project have?
- How much validation debt?
- How much reproducibility debt?
A monthly review forces you to look up and see the whole picture, rather than continuously burying yourself in experiments.
Review Checklist (Complete in 30 Minutes)
Exploration Debt Review (10 Minutes)
# 1. Quantify code disorder
git ls-files | wc -l                    # total number of files
git ls-files | grep "test\|tmp" | wc -l  # number of temporary files
git log --oneline | head -20            # most recent 20 commits

# 2. Quantify output disorder
du -sh outputs/                         # total size
ls outputs/ | wc -l                     # number of directories
find outputs/ -name "run.json" | wc -l  # number of experiments with records

# 3. Compute the exploration-debt metric
recorded experiments / total number of directories = record coverage
Health criteria:
- Record coverage >80%: Good
- Record coverage 60–80%: Warning
- Record coverage <60%: Dangerous (requires immediate cleanup)
Validation Debt Review (10 Minutes)
# Check validation completeness

Candidate paper results checklist:
[ ] Main experiment (Table 2) → run_id: __________
[ ] Baseline comparison (Table 3) → run_id: __________
[ ] Ablation study (Table 4) → run_id: __________
[ ] Failure case analysis (Figure 5) → run_id: __________

For each result:
[ ] Has a complete run.json
[ ] Has a baseline comparison (fair evaluation)
[ ] Has multiple runs (not a fluke)
[ ] Has test coverage (smoke test passes)
Health criteria:
- All candidate paper results have run_id: Good
- Missing 1–2: Warning (fill in next month)
- Missing 3 or more: Dangerous (the paper cannot be written)
Reproducibility Debt Review (10 Minutes)
# Identify the 3 most important experiments
TOP_3_RUNS="..."

# Run a reproducibility test for each experiment
for run_id in $TOP_3_RUNS; do
    echo "Testing $run_id..."

    # Check records
    [ -f outputs/$run_id/run.json ] || echo "❌ Missing run.json"

    # Quick reproduction test (small data)
    python train.py \
        --config outputs/$run_id/config.yaml \
        --data_subset 100 --epochs 2 \
        || echo "❌ Quick reproduction failed"

    # Dependency check
    pip install -r outputs/$run_id/requirements.txt \
        || echo "⚠️  Dependencies may have changed"
done
Health criteria:
- All 3 can be quickly reproduced: Good
- 2 can be reproduced: Warning
- 1 or 0 can be reproduced: Dangerous (requires urgent fixes)
Debt Visualization
It is recommended to maintain a “debt trend chart”:
# debt_tracking.csv
Month,Exploration debt (record coverage),Validation debt (candidate result completeness),Reproducibility debt (reproducible ratio)
2026-01,50%,60%,33%
2026-02,70%,80%,67%
2026-03,85%,100%,100%
If debt is accumulating (numbers decreasing), it indicates that you are “borrowing against the future.” If debt is decreasing (numbers increasing), it indicates that you are “repaying debt.”
Goal: In the three months before the paper deadline, all debt metrics should be >90%.
Early Action 3: Establish a “Reproducibility Baseline” Three Months Before the Paper (1 Hour)
Why It Matters
The biggest misconception: believing that reproducibility only needs to be considered during the “paper writing phase.”
Reality: if you wait until writing the paper to start preparing reproducibility materials, you will find that:
- Many experimental details have already been forgotten
- Code versions no longer match
- Data can no longer be found
- The environment has changed
Correct approach: establish a reproducibility baseline during the “experimentation phase,” so that during the paper phase you only need to validate and supplement.
Contents of the Reproducibility Baseline
Minimal Reproduction Package (Build in 1 Hour)
reproduce/
  README.md              # reproduction guide
  environment.yaml       # environment specification
  data_manifest.txt      # data inventory
  baseline_runs.txt      # list of key experiments
  reproduce.sh           # one-click reproduction script
  verify.py              # verification script
README.md Template
# Reproduction Guide

## Environment Setup (10 Minutes)

```bash
# Create the environment
conda env create -f environment.yaml
conda activate research-env

# Verify installation
python verify.py --check-env
Data Preparation (30 Minutes)
    # Download data (requires ~5GB of space)
    bash scripts/download_data.sh

    # Verify data
    python verify.py --check-data
    ```
## Reproduce Key Experiments (6 Hours)
```bash
    # Reproduce the main experiment (Table 2, ~2 hours)
    make reproduce RUN=main_experiment
    # Expected result: accuracy 94.3% ± 0.5%

    # Reproduce the baseline (Table 3, ~2 hours)
    make reproduce RUN=baseline
    # Expected result: accuracy 92.0% ± 0.3%
Reproducing the Ablation Study (Table 4, ~2 hours)
bash scripts/reproduce_ablation.sh
Verifying the Results
# Automatically verify all results
python verify.py --check-results

# The output should show:
# ✅ Main experiment: within expected range
# ✅ Baseline: within expected range
# ✅ Ablation: all components verified
Troubleshooting
See docs/TROUBLESHOOTING.md
verify.py Example
import json
from pathlib import Path

def verify_environment():
    """Verify that the environment is correctly configured"""
    import torch
    print(f"✅ PyTorch version: {torch.__version__**")
    print(f"✅ CUDA available: {torch.cuda.is_available()**")
    # Additional checks...

def verify_data():
    """Verify that the data are complete"""
    data_manifest = Path("data_manifest.txt").read_text()
    # Check whether files exist and whether hashes match...
    print("✅ Data verification passed")

def verify_results(run_id, expected_metric, tolerance=0.01):
    """Verify that results fall within the expected range"""
    run_json = Path(f"outputs/{run_id**/run.json")
    with open(run_json) as f:
        run_info = json.load(f)

    actual = run_info["metrics"]["test_acc"]
    diff = abs(actual - expected_metric)

    if diff <= tolerance:
        print(f"✅ {run_id**: {actual:.3f** "
              f"(expected {expected_metric:.3f** ± {tolerance:.3f**)")
        return True
    else:
        print(f"❌ {run_id**: {actual:.3f** "
              f"(expected {expected_metric:.3f**, diff {diff:.3f**)")
        return False

if __name__ == "__main__":
    import argparse
    parser = argparse.ArgumentParser()
    parser.add_argument("--check-env", action="store_true")
    parser.add_argument("--check-data", action="store_true")
    parser.add_argument("--check-results", action="store_true")
    args = parser.parse_args()

    if args.check_env:
        verify_environment()
    if args.check_data:
        verify_data()
    if args.check_results:
        # Verify all key experiments
        verify_results("main_experiment", expected_metric=0.943)
        verify_results("baseline", expected_metric=0.920)
        # ...
When to Establish It
Best timing: As soon as you obtain the first result that “looks publishable,” immediately establish a reproducibility baseline.
Do not wait until:
- ❌ all experiments are finished
- ❌ you start writing the paper
- ❌ you are preparing for submission
Instead, do it when:
- ✅ you have the first promising result (even if it is not yet perfect)
- ✅ you have confirmed the overall technical direction
- ✅ you can answer “what this project ultimately aims to demonstrate”
Rule of thumb: Establish the reproducibility baseline 3 months before the paper deadline. For a conference paper (a 6-month project), establish it in month 3.
Emergency Remediation Plan: If You Are Already in the Final Stage
If Only 2 Weeks Remain Until the Deadline
Accept reality: You do not have time to “do everything right.” You must focus on what matters most.
Priority 1: Ensure the Main Result Is Reproducible (3 days)
# Day 1: Locate the code version for the main experiment
# - Reconstruct from Git history, chat logs, and notes
# - Find the closest commit
# - Fill in run.json (reconstruct parameters as much as possible)

# Day 2: Rerun in a clean environment
# - Create a new virtual environment
# - Record all dependencies
# - Rerun and record the results

# Day 3: If exact reproduction is not possible
# - If the discrepancy is within 1–2%: acceptable; report the error margin
# - If the discrepancy is larger: honestly explain the reasons in the paper
# - Worst case: switch to a reproducible, second-best result
Priority 2: Patch the Most Critical Validations (2 days)
Only add validations that reviewers will definitely ask for:
- If you can only choose one: add a fair baseline comparison
- If you can choose two: additionally add the main ablation study
- For the rest: you can state “due to time constraints, left for future work”
Priority 3: Write Minimal Reproducibility Documentation (1 day)
# Minimal reproducibility documentation includes:
- Environment specification (Python version, key library versions)
- Data acquisition method (links or contact information)
- Execution commands (even if there is only one)
- Expected results (numerical ranges)
- Known issues (honestly describe reproducibility difficulties)
If There Is Only 1 Week Left Until the Deadline
The brutal truth: you no longer have time to rerun experiments. You can only do your best to patch the records.
# What you can do (2 hours each):
[ ] Add run.json for all paper experiments (reconstruct from memory as much as possible)
[ ] Tag the current code with a Git tag (preserve the current state)
[ ] Write the simplest reproduction instructions (a section in the README)
[ ] Package and back up all output files (to prevent loss)

# What not to do (there is no time):
[ ] Do not try to rerun all experiments
[ ] Do not try to build a perfect reproduction environment
[ ] Do not try to fix all inconsistencies
Mindset adjustment: accept imperfection, but ensure minimal traceability. Getting the paper submitted matters more than perfect reproducibility.
Post-hoc Remediation
If the paper is accepted and you are asked to provide code:
# You have 2–4 weeks to remediate

Week 1: Trace back and document
-
Locate all code versions relevant to the paper
-
Reproduce key results as much as possible
-
Document every point of “inconsistency”
Week 2–3: Clean up and validate
-
Clean up the code (remove irrelevant parts)
-
Add documentation and comments
-
Ensure at least 1–2 results are reproducible
Week 4: Package and release
-
Organize the code into a releasable form
-
Write a clear README
-
Honestly state the limitations of reproducibility in the paper
10-Minute Action: A Self-Check You Can Do Today
If you do only one thing right now: perform a minimal self-check on the current project.
-
Identify the most important experiment (1 minute)
Ask yourself: if you could keep only one experimental result, which would it be? Write down its run_id (if it does not exist, create one now) -
Check record completeness (3 minutes)
[ ] Is there a run.json? [ ] Do you know which Git commit was used? [ ] Do you know which config was used? [ ] Do you know the random seed? [ ] Do you know the data version? If any item is missing, remediate immediately (writing it in your notes is fine) -
Quick reproduction test (5 minutes)
# Use a small dataset to test whether the pipeline runs end-to-end python train.py \ --config <your config> \ --data_subset 100 \ --epochs 2 If an error occurs, record the error message and prioritize fixing it next time you work -
Set the next self-check time (1 minute)
  Add to your calendar:
  - Every Friday 17:00: reproducibility self-check (15 minutes)
  - The last day of each month: debt inventory (30 minutes)
  - [project start + 3 months]: establish a reproducibility baseline (1 hour)
After completing this 10-minute self-check, you will obtain two important outcomes:
-
Confidence: you know the project’s core results are traceable
-
Early warning: if you discover problems, you still have time to fix them
Chapter Summary: Prevention Is Better Than Firefighting
The fundamental reason for last-stage blowups is: postponing validation until the very end.
The right mindset is:
-
Do not wait until you are “sure it works” to record——any result that “looks good” should be recorded immediately
-
Do not wait until you “write the paper” to verify reproducibility——verify continuously in day-to-day work
-
Do not wait until “reviewers ask” to add experiments——identify validation debt early and proactively pay it down
Three proactive actions are your insurance:
-
Weekly self-check: ensure recent work is traceable (15 minutes)
-
Monthly inventory: ensure debt does not spiral out of control (30 minutes)
-
Establish a reproducibility baseline early: ensure you are not scrambling in the final stage (1 hour)
Total monthly time investment: 15 minutes × 4 + 30 minutes + 1 hour (first time) = 2.5 hours
This 2.5-hour investment can avoid 3 days to 3 weeks of firefighting time in the final stage.
Remember: uncertainty in research is inevitable, but last-stage blowups are preventable.
Version for Students/Collaborators: Minimal Team Standards
Story Setup: From “Fighting Alone” to “Dragging Each Other Down”
Your research team has three people: you (a PhD student), a junior master’s student, and an undergraduate intern. You are working on the same project and should be collaborating.
But reality looks like this:
Monday Morning Stand-up
You: “I ran a new model over the weekend. The results look good—95% accuracy.”
Junior: “Great! Can you send me the code? I want to keep improving it based on that.”
You: “Uh… the code is on my computer and it’s kind of messy. I’ll organize it and send it to you.” (In fact, you have no idea where to start organizing.)
Intern: “Did you use the data preprocessing I did last week?”
You and the junior: “Uh… which version did you use?”
Intern: “The link I posted in the group chat…” (All three scroll through the chat history and can’t find it.)
Advisor: “What exactly are you three doing? Why are the numbers each of you reports different?”
Wednesday Code Conflicts
Junior: “Senior, I pushed the code. Pull it.”
You pull the code and get:
CONFLICT (content): Merge conflict in src/model.py
CONFLICT (content): Merge conflict in configs/default.yaml
CONFLICT (content): Merge conflict in train.py
You open the code and see that the junior modified almost every file. And many changes are incomprehensible to you—he added a bunch of new parameters without any comments.
You spend two hours resolving conflicts, only to discover in the end: your code was overwritten, and last week’s good results can no longer be reproduced.
Friday Data Disaster
Intern: “Senior, I accidentally deleted the data/ directory. Do you have a backup?”
You: “What?! That directory is 20GB—data I spent three days processing!”
Intern: “I thought it was temporary… Git wasn’t tracking it…”
Neither you nor the junior has a complete backup. You have to re-download the raw data and rerun three days of preprocessing.
A week passes. Not only has the project made no progress—it has actually regressed.
Why “Individually Strong” Does Not Equal “Team Efficient”
The counterintuitive part of teamwork is this: each individual may be highly capable, yet the team’s output is very low.
Three Major Collaboration Traps
Trap 1: Dependence on Tacit Knowledge
Everyone carries a lot of information in their head that “only they know”:
- Why this parameter is set to this value
- Why this code is written this way
- Why this experiment failed
- Why this dataset must be processed in this manner
When collaboration is required, this tacit knowledge becomes a bottleneck—others can only “wait until you have time to explain,” while you are interrupted repeatedly.
Trap 2: Duplicated Work
Without clear division of labor and interfaces, you end up with:
- Two people writing functionally identical code with different implementations
- Two people processing the same data in different ways
- Two people running the same experiment but recording it differently
On the surface it looks like “parallel work,” but in reality it is “wasted compute and time.”
Trap 3: Exploding Integration Costs
Everyone “does well” on their own branch, but when merging you find:
- Incompatible interfaces
- Dependency version conflicts
- Inconsistent configuration methods
- Inconsistent evaluation criteria
In the end, the time spent on “merging and alignment” exceeds the time spent on development.
Root Cause: Lack of “Team Standards”
A personal project can be “anything goes”—after all, only you need to understand it.
But a team project requires explicit standards:
- How code should be written
- How experiments should be recorded
- How changes should be merged
- How issues should be communicated
No standards = everyone uses their own approach = collaboration becomes impossible.
Minimal Standard 1: Coding Standards (From Chaos to Readability)
Naming Conventions: Make Code Self-Explanatory
File Naming
# ❌ Bad naming
test.py
new.py
model2.py
train_final.py

# ✅ Clear naming
train_baseline.py              # Train the baseline model
train_with_attention.py        # Train the model with attention
evaluate_on_testset.py         # Evaluate on the test set
preprocess_raw_data.py         # Preprocess raw data
Variable and Function Naming
# ❌ Bad naming
def f(x, y):
    z = x + y
    return z

# ✅ Clear naming
def compute_weighted_loss(prediction, target, weight):
    """
    Compute weighted loss

    Args:
        prediction: Model predictions (batch_size, num_classes)
        target: Ground-truth labels (batch_size,)
        weight: Class weights (num_classes,)

    Returns:
        loss: Weighted cross-entropy loss
    """
    raw_loss = cross_entropy(prediction, target)
    weighted_loss = raw_loss * weight[target]
    return weighted_loss.mean()
Naming principles:
- Use full words; avoid abbreviations (unless they are widely accepted, such as num, max, avg)
- Start function names with verbs (compute, load, save, train, evaluate)
- Use nouns for variable names (model, dataset, config, metrics)
- Prefix boolean variables with is/has/should (is_training, has_attention, should_save)
Commenting Standards: Written for Future You and Your Teammates
Places That Must Be Commented
-
Function docstrings (every function must have one)
  def train_one_epoch(model, dataloader, optimizer, device):
      """
      Train for one epoch

      Args:
          model: PyTorch model
          dataloader: Training data loader
          optimizer: Optimizer
          device: Device ('cuda' or 'cpu')
Returns: avg_loss: Average loss accuracy: Training accuracy “”“ …
-
Non-obvious logic
# Apply temperature scaling to attention weights to prevent softmax saturation attention_scores = attention_scores / temperature # Use gradient clipping to prevent exploding gradients # The threshold is set to 1.0 based on preliminary experiments torch.nn.utils.clip_grad_norm_(model.parameters(), max_norm=1.0) -
Known issues and TODOs
  # TODO: The implementation here is inefficient and needs optimization
  # Currently O(n^2) complexity; it will be slow when the dataset is large

  # FIXME: Crashes when batch size = 1
  # Temporary workaround: check at the outer level and skip

  # NOTE: This hyperparameter has a large impact on the results
  # Be sure to test on a small dataset before making changes
Where you should not add comments
# ❌ Do not comment on the obvious
x = x + 1  # Add 1 to x

# ❌ Do not use comments to "explain bad code"; refactor instead
# This function is complex, does many things—read it slowly...
def complicated_function():
    ...

# ✅ Refactor into clear functions
def load_data():
    ...

def preprocess_data(data):
    ...

def train_model(data):
    ...
PR template: use it even when working alone
A Pull Request (or Merge Request) template forces you to answer key questions before merging.
Create a PR template
# .github/pull_request_template.md

## Summary of changes
[Describe in one sentence what this PR does]

## Type of change
-
New feature (feature)
-
Bug fix (fix)
-
Refactor (refactor)
-
Documentation (docs)
-
Test (test)
Details
[Explain in detail what changed and why]
How to verify
# Provide verification steps
make test
python train.py --config configs/test.yaml
Potential risks
[What issues might this change introduce?]
Related experiments
-
Run ID: [If relevant, provide run_id]
-
Results comparison: [Metric comparison between the new/old implementations]
Checklist
-
Code passes lint checks
-
Necessary tests added
-
Relevant documentation updated
-
All tests pass
-
Changes do not break existing functionality (regression testing)
Why “use it even when working alone”?
-
Forces you to think about “what exactly does this change do?”
-
Leaves a clear record for future teammates (or future you)
-
Once it becomes a habit, team collaboration naturally becomes standardized
Minimal standard 2: Experiment standards (from verbal to auditable)
Standardize run_id naming
Problem: Everyone names experiments differently, causing confusion.
Solution: The team standardizes a run_id format.
# Team-wide standard format
YYYY-MM-DD_HHMM_<person>_<experiment>

For example:
2026-02-15_1030_zhangsan_baseline
2026-02-15_1400_lisi_attention_ablation
2026-02-16_0900_wangwu_data_augmentation
Benefits:
-
Sortable by time
-
You know whose experiment it is (so you know who to ask when something goes wrong)
-
You know what the experiment is about
Standardize config management
Problem: Everyone uses different config formats, making comparisons impossible.
Solution: The team shares a single base config; individuals write only the differences.
configs/
  base.yaml              # Team baseline configuration
  people/
    zhangsan_*.yaml      # Zhangsan's personal experiment configs
    lisi_*.yaml          # Lisi's personal experiment configs
  paper/                 # "Official" configs related to the paper
    baseline.yaml
    main_method.yaml
    ablation_*.yaml
base.yaml example
# configs/base.yaml
# Team baseline configuration; do not modify casually
# If changes are necessary, they must be discussed in a team meeting

model:
  type: "transformer"
  hidden_dim: 512
  num_layers: 6

data:
  path: "/data/shared/project_data_v3"
  batch_size: 32
  num_workers: 4

training:
  epochs: 100
  learning_rate: 3e-4
  optimizer: "adam"

evaluation:
  metric: "accuracy"
  eval_every: 1000
Personal config example
# configs/people/zhangsan_attention_test.yaml

# Inherit the baseline configuration
base: ../base.yaml

# Specify only the differences
model:
  attention_type: "multi_head"  # Change point
  num_heads: 8                  # New parameter added
Tagging Experiment Metadata
experiment:
  owner: "Zhang San"
  hypothesis: "Multi-head attention can improve accuracy by 2–3%"
  related_runs:
    - "2026-02-15_1030_zhangsan_baseline"
Standardize the logging format
Problem: Everyone records experiments differently, making it impossible to aggregate and compare.
Solution: Use standardized run.json and run.md templates (see Chapter 6).
Team conventions:
-
Within 10 minutes after each experiment finishes, you must: - Generate run.json (automatic) - Fill in run.md (manually, 5 lines)
-
Required fields in run.md: - Hypothesis: what this experiment aims to validate - Change: what was changed compared to what - Conclusion: what the result is (one sentence) - Next step: what to do next based on the result - @ Advisor: whether advisor attention is needed
-
If you forget to record: - You will be reminded at the group meeting that week - If you forget twice consecutively: you must backfill all missing records
Minimum Standard 3: Communication Norms (from verbal to traceable)
Weekly meeting norm: only review reproducible runs
Problem: Weekly group meetings turn into a “verbal reporting contest”—claims sound impressive but lack evidence.
Solution: Discuss only experiments with a run_id.
Weekly meeting template
# Weekly Group Meeting (30–45 minutes)

## 1. Round-robin updates (5–10 minutes per person)

Format:
-
Experiments completed this week: [list run_id]
-
Key findings: [based on experimental data, not speculation]
-
Issues encountered: [specific issues, not “not great”]
-
Plan for next week: [specific goals, not “keep tuning hyperparameters”]
❌ Unacceptable updates:
-
“I think this method should work” (no experimental support)
-
“I ran many experiments” (without listing run_id)
-
“The results are okay” (without concrete metrics)
✅ Good example: “I ran three experiments:
- 2026-02-15_1030_zhangsan_baseline: 92.0%
- 2026-02-15_1400_zhangsan_attention: 93.5% (+1.5%)
- 2026-02-16_0900_zhangsan_attention_v2: 93.2% (+1.2%) Conclusion: the attention mechanism is effective, but the improvements introduced in v2 instead reduced performance. Plan for next week: investigate why v2 is worse and try to fix it.“
2. Team decisions (10 minutes)
-
Which experiments should be merged into the mainline?
-
Which directions should be abandoned?
-
Who is responsible for what next week?
3. Debt check (5 minutes)
-
Check whether last week’s TODOs are completed
-
Check whether there are unlogged experiments
-
Check whether there is conflicting code that needs to be merged
4. Next-week assignments (5 minutes)
Clarify each person’s tasks and deliverables:
-
Zhang San: complete ablation experiments (estimated 3 runs)
-
Li Si: improve data augmentation (estimated 2 runs)
-
Wang Wu: organize scripts for paper figures and tables
Asynchronous communication norm: use documents rather than verbal exchanges
Problem: Teammates interrupt you at inappropriate times to ask questions.
Solution: Build a culture of “read the docs first, then ask people.”
Team documentation structure
docs/
  README.md              # Project overview
  SETUP.md               # Environment setup guide
  WORKFLOW.md            # Workflow
  FAQ.md                 # Frequently asked questions
  EXPERIMENTS.md         # Experiment tracking
  DECISIONS.md           # Record of important decisions
  CONTACTS.md            # Who owns what
FAQ.md example
# Frequently Asked Questions

## Q: How do I set up the environment?
See SETUP.md

## Q: Where is the data stored?
`/data/shared/project_data_v3`
Do not modify this directory; it is read-only.

## Q: How do I submit code?
-
Create a branch: git checkout -b exp/your-name-feature
-
Complete changes and test
-
Submit a PR (use the template)
-
Wait for review
-
Delete the branch after merging
Q: What should I do if an experiment crashes?
-
Check outputs/<run_id>/error.log
-
Search the FAQ to see whether there is a similar issue
-
If you cannot find an answer, ask in an issue (do not message directly on WeChat)
Q: How do I reproduce someone else’s experiment?
make reproduce RUN=<run_id>
Q: Can I modify base.yaml?
No. It can be changed only after discussion in a team meeting. For temporary testing, you may create your own config.
Q: My experimental results differ from someone else’s—what should I do?
-
Check whether you used the same config
-
Check whether you used the same data version
-
Check whether you used the same random seed
-
Discuss at the weekly meeting
Issue tracking: make problems and tasks searchable
Problem: People discuss issues in the WeChat group, and three days later no one can find them.
Solution: Important issues must be filed as an issue (GitHub/GitLab/Jira).
Issue template
# Bug Report
**Problem description**: [briefly describe the issue]

**Steps to reproduce**:
-
Run the command:
python train.py --config ... -
Observe: [screenshots or logs]
Expected behavior: [what should happen]
Actual behavior: [what actually happens]
Environment information:
-
Branch: [branch name]
-
Commit: [commit hash]
-
Python: [version]
-
CUDA: [version]
Related run_id: [if any]
# Feature Request
**Request description**: [what functionality you want]

**Use case**: [why it is needed]

**Proposed implementation**: [optional]
# Task
**Task description**: [what needs to be done]

**Acceptance criteria**: [what counts as done]

**Owner**: [@someone]

**Due date**: [YYYY-MM-DD]

**Dependencies**: [does it depend on other tasks?]
Advisor’s perspective: how to help students build good habits
Day 1: Set expectations
Do not assume students will “naturally do it right.” You must explicitly communicate your expectations.
Onboarding checklist
# New Member Onboarding Checklist
Day 1 (Environment Setup)
- Set up the development environment (see SETUP.md)
- Obtain access to the code repository
- Obtain server access
- Obtain access to shared data
- Read README, WORKFLOW, FAQ
Week 1 (Familiarizing Yourself with the Workflow)
- Reproduce an existing experiment (verify the environment setup is correct)
- Run a small experiment (verify your understanding of the workflow)
- Record experiments comprehensively (run.json + run.md)
- Submit your first PR (even if it is very small)
Month 1 (Working Independently)
- Independently complete one exploratory direction
- Proactively identify and solve problems
- Be able to help onboard new members
Regular Reviews: Focus Not Only on Results, but Also on Process
Do not only ask “How are the results?” in weekly meetings; check “Is the process standardized?”
Weekly Code Review Checklist
Checklist:
- Are all experiments from this week fully documented?
- Does the run_id follow the naming convention?
- Have the config files been updated?
- Are commit messages clear?
- Are there improvements that should be merged?
- Is there any technical debt that needs to be addressed?
If issues are found, point them out immediately and require corrections. Do not say “Don’t do it again,” otherwise bad habits will become entrenched.
Reward Good Habits
Explicitly praise what was done well:
-
“Your experiment records this week are very clear; I can understand them at a glance.”
-
“Your PR description is very detailed; the review went smoothly.”
-
“You proactively supplemented the documentation, which helped everyone.”
Make good habits part of the team culture.
From a Student’s Perspective: How to Survive in a Chaotic Project
If the Project Is Already Very Chaotic
You may encounter:
- Your advisor’s code has no documentation
- A senior student’s code does not run
- No one knows where the data is stored
- No one knows how a certain experiment was run
Survival strategies:
Strategy 1: Create a “Clean Zone” for Yourself
# Create your own subproject within a chaotic project

my_workspace/
  src/           # Your code (independent of the chaotic parts)
  configs/       # Your configurations
  outputs/       # Your experiment records
  docs/          # Your documentation
  README.md      # Description of your work
Even if the overall project is messy, at least your part is clear.
Strategy 2: Write Down Your Understanding
# docs/MY_UNDERSTANDING.md

## Project Goals
[What I understand the project goals to be]

## Existing Code
[Key files I found and their roles]

## Known Issues
[Issues I encountered and temporary workarounds]

## My Work
[What I am responsible for and my progress]
This document:
- Helps you clarify your thinking
- Provides a record for future handoffs
- Enables you to align understanding with your advisor
Strategy 3: Proactively Establish Standards
Even if the team has no standards, you can establish standards for yourself:
- All your experiments have a run_id and documentation
- Your code has clear comments
- All your commits have descriptions
Good habits will be noticed and may influence the team.
How to Ask for Help
❌ A poor way to ask for help:
“Senior, my code won’t run—can you take a look?” (no context at all)
✅ A good way to ask for help:
Senior, I ran into an issue while reproducing the baseline experiment. Could you help take a look?

**Issue**: It crashes at epoch 10 with the error CUDA out of memory

**My setup**:
-
Branch: main
-
Commit: a1b2c3d
-
Config: configs/baseline.yaml
-
GPU: V100 16GB
What I tried:
-
Reduce batch size to 16 (still crashes)
-
Reduce model hidden_dim to 256 (it runs, but the results are incorrect)
Logs: see attached error.log
Question: Are there other configurations that need adjustment, or do I need a larger GPU?
Clear help requests receive faster and more useful responses.
Conflict Resolution: Common Team Issues
Issue 1: Inconsistent Code Style
Solution: Enforce consistency with automated tools.
# Install formatter and linter
pip install black flake8 isort

# .pre-commit-config.yaml
repos:
  - repo: https://github.com/psf/black
    rev: 23.1.0
    hooks:
      - id: black

  - repo: https://github.com/PyCQA/flake8
    rev: 6.0.0
    hooks:
      - id: flake8

# Install the pre-commit hook
pre-commit install

# Now formatting will run automatically before each commit
Issue 2: Experimental Results Do Not Match
Troubleshooting checklist:
- Same code version? (commit hash)
- Same configuration? (config diff)
- Same data? (data hash)
- Same random seed? (seed)
- Same environment? (Python/CUDA versions)
- Same evaluation script? (eval script)
Check item by item; you will always find the cause.
Issue 3: Unclear Responsibilities Lead to Duplicate Work
Solution: Use a Kanban board to visualize tasks.
# You can use GitHub Projects or Trello

Board columns:
-
To Do (TODO)
-
In Progress (In Progress)
-
Waiting for Review (Review)
-
Done (Done)
Each task card:
-
Title: [brief description]
-
Owner: [@someone]
-
Due date: [date]
-
Dependencies: [dependent tasks]
-
Status: [current progress]
Everyone can see “who is doing what,” avoiding duplication.
Issue 4: Misaligned Expectations Between Advisor and Student
Solution: Write expectations down explicitly and realign regularly.
# docs/EXPECTATIONS.md

## Advisor Expectations
-
At least 3 documented experiments per week
-
All code passes linting and tests
-
Attend weekly meetings on time and report progress
-
Report issues within 24 hours
Student Expectations
-
One 1-on-1 Q&A session per week
-
Key decisions discussed in advance
-
Code reviews completed within 48 hours
-
Requirements stabilized one month before the paper deadline
Mutual Commitments
- Communicate honestly and do not conceal problems
- Respect each other’s time
- Share responsibility for the project’s success
Making expectations explicit can prevent many latent conflicts.
10-Minute Action: Establish the Team’s First Standard
If you do only one thing right now: establish the team’s first minimal standard.
- If you are a mentor/project lead (10 minutes)
# Create the team standards document
mkdir docs
cat > docs/TEAM_RULES.md <<EOF
# Minimal Team Standards

## Experiment Logging Standards
- Every experiment must have a run_id: YYYY-MM-DD_HHMM_name_experiment
- Every experiment must have run.json (automatic) and run.md (manual, 5 lines)

## Code Commit Standards
- Commit message format: `<type>`: `<description>`
  - type: feat | fix | refactor | docs | test
- Run make test before committing

## Weekly Meeting Standards
- Fixed time: every Monday at 10:00
- Must prepare in advance: list run_id and key findings
- Discuss only content supported by experimental evidence

## Communication Standards
- Open a GitHub issue for important matters (do not discuss only on WeChat)
- Urgent matters may be handled on WeChat, but file an issue afterward

## Effective Date
Effective starting next Monday.
EOF

# Announce and discuss at the next group meeting
- If you are a student/team member (10 minutes)
# Establish a personal working standard

cat > MY_WORKFLOW.md <<EOF
# My Workflow

## After each experiment (5 minutes)
- [ ] Generate run.json
- [ ] Fill in the five elements in run.md
- [ ] Commit relevant code changes

## Every Friday (15 minutes)
- [ ] Organize the list of this week’s experiments
- [ ] Prepare materials for the weekly meeting report
- [ ] Check for any missing records

## Before each code commit (2 minutes)
- [ ] Run make test
- [ ] Write a clear commit message
- [ ] If the change is important, open a PR

## Whenever I encounter a problem
- [ ] Check the FAQ and documentation first
- [ ] If no answer is found, open an issue (describe clearly)
- [ ] After the problem is solved, update the FAQ
EOF

# Start executing from today
- Proposal for the next team meeting (prepare a 5-minute statement)
Suggest saying in the meeting:
“I’ve noticed that our team is somewhat chaotic in experiment logging and code management. I suggest we establish some minimal standards, such as:
- A unified run_id format
- A unified approach to config management
- A weekly check of experiment record completeness
I drafted an initial version (see docs/TEAM_RULES.md), and everyone can discuss and add to it.
I suggest we pilot it starting next week and evaluate the results after one month.“
After completing this 10-minute action, you will find:
- The team has a “starting point”—a starting point for moving from chaos to order
- Everyone has a shared language—knowing what it means to “do it well”
- Subsequent improvements can be iterative—rather than remaining chaotic indefinitely
Chapter Summary: Standards Are Not Constraints, but the Foundation of Efficient Collaboration
The paradox of teamwork:
- No standards: everyone is “free,” but team efficiency is extremely low
- Over-standardization: processes become cumbersome and constrain creativity
- Minimal standards: just enough—ensuring quality while maintaining flexibility
Three levels of minimal standards:
- Coding standards: make code readable, maintainable, and collaborative
- Experiment standards: make experiments traceable, comparable, and reproducible
- Communication standards: make issues searchable, decisions traceable, and responsibilities clear
Remember:
- Standards are not “management” tools, but “collaboration” tools
- Standards are not “restrictions,” but “friction reduction”
- Standards are not “one-time setup,” but “continuous improvement”
Finally: If your team is chaotic right now, do not be discouraged. Start with a minimal standard and improve step by step. Even if you are the only one to begin, good habits will gradually influence the team.
High-performing teams are not “born”; they are built by establishing standards and executing them consistently.
Template Library (You Can Start Using It Today)
PR/Commit Description Template (Write It Even If You Work Alone)
-
Purpose:
-
Changes:
-
Impact on results? (Yes/No):
-
Verification command:
-
Expected output:
-
Risk points and rollback:
Experiment Log run.md (Five Lines Are Enough)
-
Hypothesis:
-
Change:
-
Result (metric + one-sentence conclusion):
-
Compare-to (baseline run_id):
-
Next:
Makefile Targets (Make Reproducibility a Habit)
-
make test(smoke test) -
make train CONFIG=... -
make eval RUN=... -
make reproduce RUN=...
Appendix B: CLAUDE.md Template
Save the following content as CLAUDE.md in your project root. AI assistants will automatically follow these rules.
# CLAUDE.md - Research Engineering Rules

## Project Info
- Project: [name]
- Language: Python
- Framework: PyTorch

## Core Principles

1. **Three Types of Debt**: Exploration debt (clean up prototypes), Validation debt (must test), Reproducibility debt (record environment)
2. **Six Experiment Elements**: Code version, Data version, Config, Environment, Results, Logs
3. **AI is an Assistant**: Generation can be fast, deployment must be slow; don't accept code you don't understand

## Directory Structure
src/ # Stable code (tested) experiments/ # Experiment code (can be rough) configs/ # Configuration files tests/ # Tests outputs/ # Output (don’t commit) data/ # Data (don’t commit)
## Git Conventions

**Commit format**: `<type>: <description>`
- `feat:` New feature | `fix:` Bug fix | `exp:` Experiment | `refactor:` Refactoring

**Rules**:
- Each change ≤200 lines
- Separate feature and refactoring commits
- Don't modify main branch directly

## AI-Generated Code Rules

**Required**:
- [ ] Include verification method
- [ ] Human review of core logic (data processing, model, evaluation)
- [ ] Verify in experiment branch first

**Forbidden**:
- Mix feature + refactoring together
- Skip tests and merge directly

## Definition of Done (DoD)

- [ ] Results are reproducible
- [ ] Can explain why it works
- [ ] Fair comparison with baseline
- [ ] Has test coverage
- [ ] Config is recorded

## Weekly Check

- [ ] Key experiments can run
- [ ] Code is pushed
- [ ] Data is backed up
Full version: See Chapter 7 “AI-Era Workflow”